
For years, powerful AI models needed massive data centers and expensive cloud subscriptions. Now that’s changing. MiniCPM 4.1-8B is a new AI model that runs on regular computers and consumer GPUs. It performs as well as much larger models but uses far fewer resources.
Think of it this way: instead of renting a semi-truck to move your furniture, you now have a compact van that does the same job faster and cheaper.
What Makes MiniCPM 4.1-8B Special?
MiniCPM 4.1-8B is an 8-billion-parameter language model that you can run on your own hardware. The team at OpenBMB built it from the ground up to be efficient.
Four Key Innovations
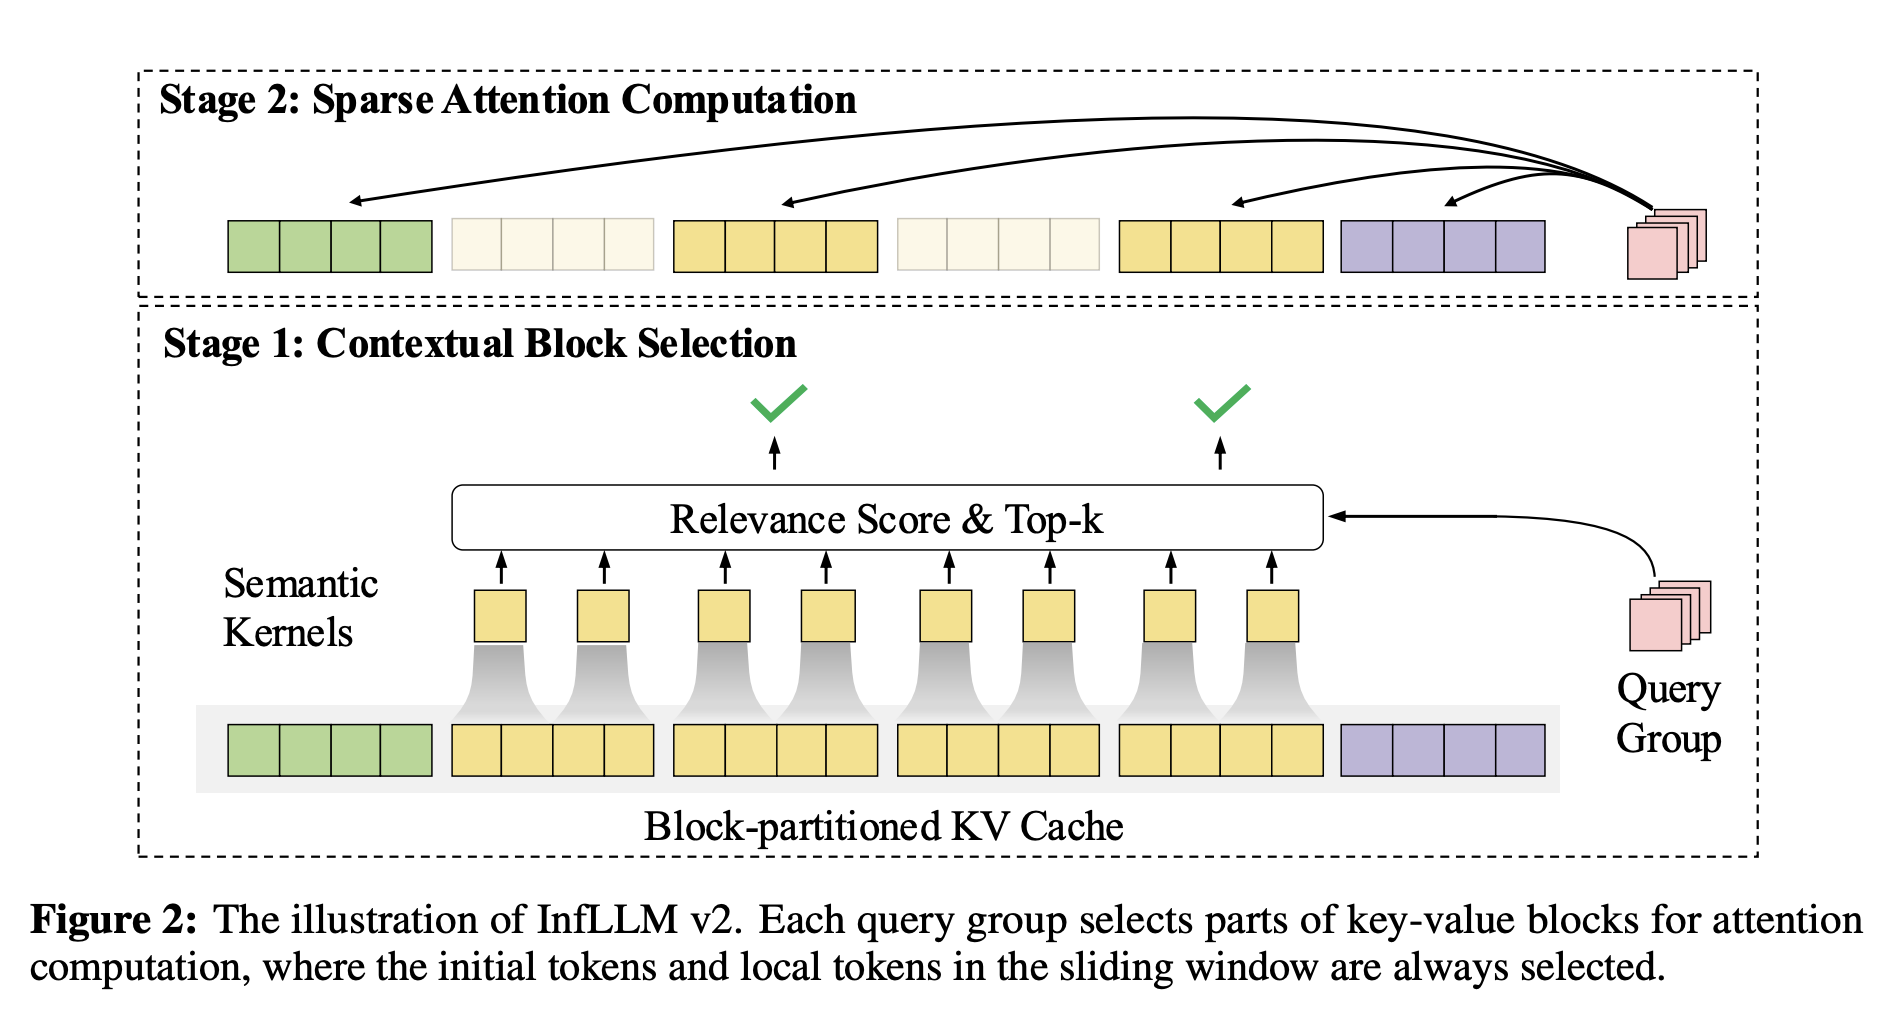
1. Smart Attention System (InfLLM v2)
Most AI models read every single word when processing text. MiniCPM 4.1 skips this. It uses “sparse attention” to focus only on the most relevant parts of the text. Imagine reading a 500-page book but only highlighting the important paragraphs; that’s what InfLLM v2 does. It ignores 81% of the text while still understanding everything perfectly.
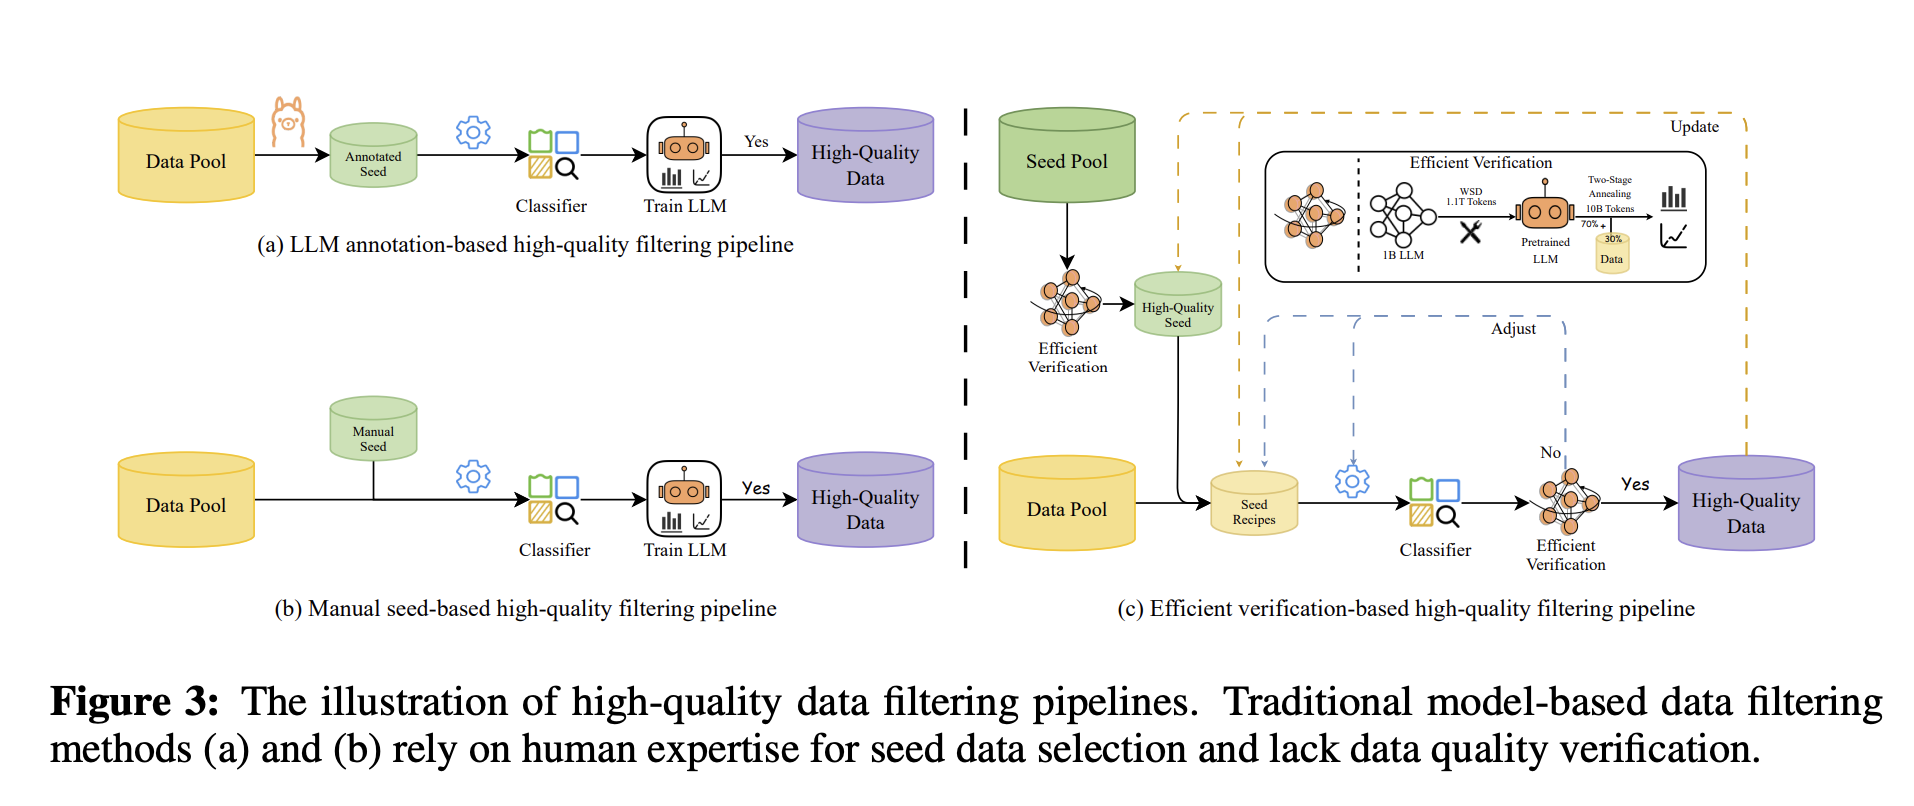
2. Better Training Data
The team trained MiniCPM 4.1 on just 8 trillion tokens of high-quality data. Compare this to Qwen3-8B, which needed 36 trillion tokens to reach similar performance. MiniCPM achieves the same results with just 22% of the training data. They filtered out low-quality content and generated reasoning-intensive data specifically for math and coding tasks.
3. Two Modes: Fast and Deep
You can run MiniCPM 4.1 in two ways:
-
Fast mode: Quick responses for simple questions
-
Deep reasoning mode: Detailed, step-by-step thinking for complex problems
This flexibility lets you choose speed or depth based on your needs.
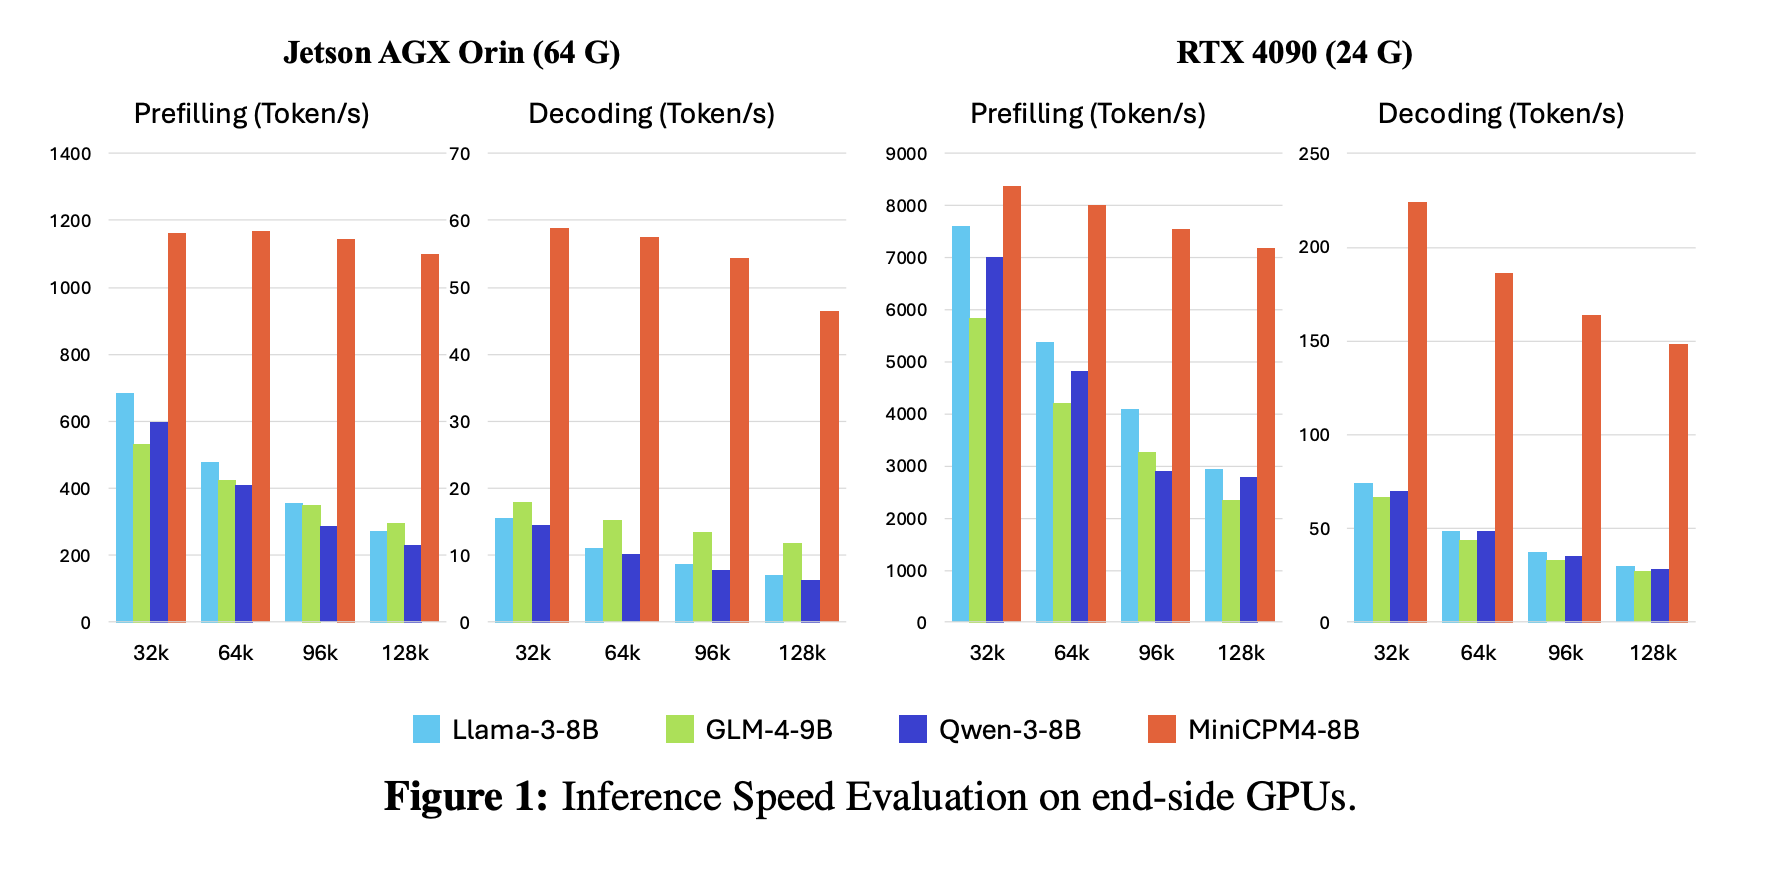
4. Incredible Speed
MiniCPM 4.1 processes long documents 7 times faster than Qwen3-8B on edge devices. When handling 128,000 words, it maintains this speed advantage throughout.
Real Performance Numbers
Here’s how MiniCPM 4.1-8B performs:
-
General Knowledge: Scores 75-81% on major benchmarks (MMLU, CMMLU, CEval)
-
Math Problems: Solves 91.5% of grade-school math correctly (GSM8K)
-
Code Writing: Passes 85% of coding tests (HumanEval)
-
Reasoning Tasks: Achieves 76.73% on complex reasoning (BBH)
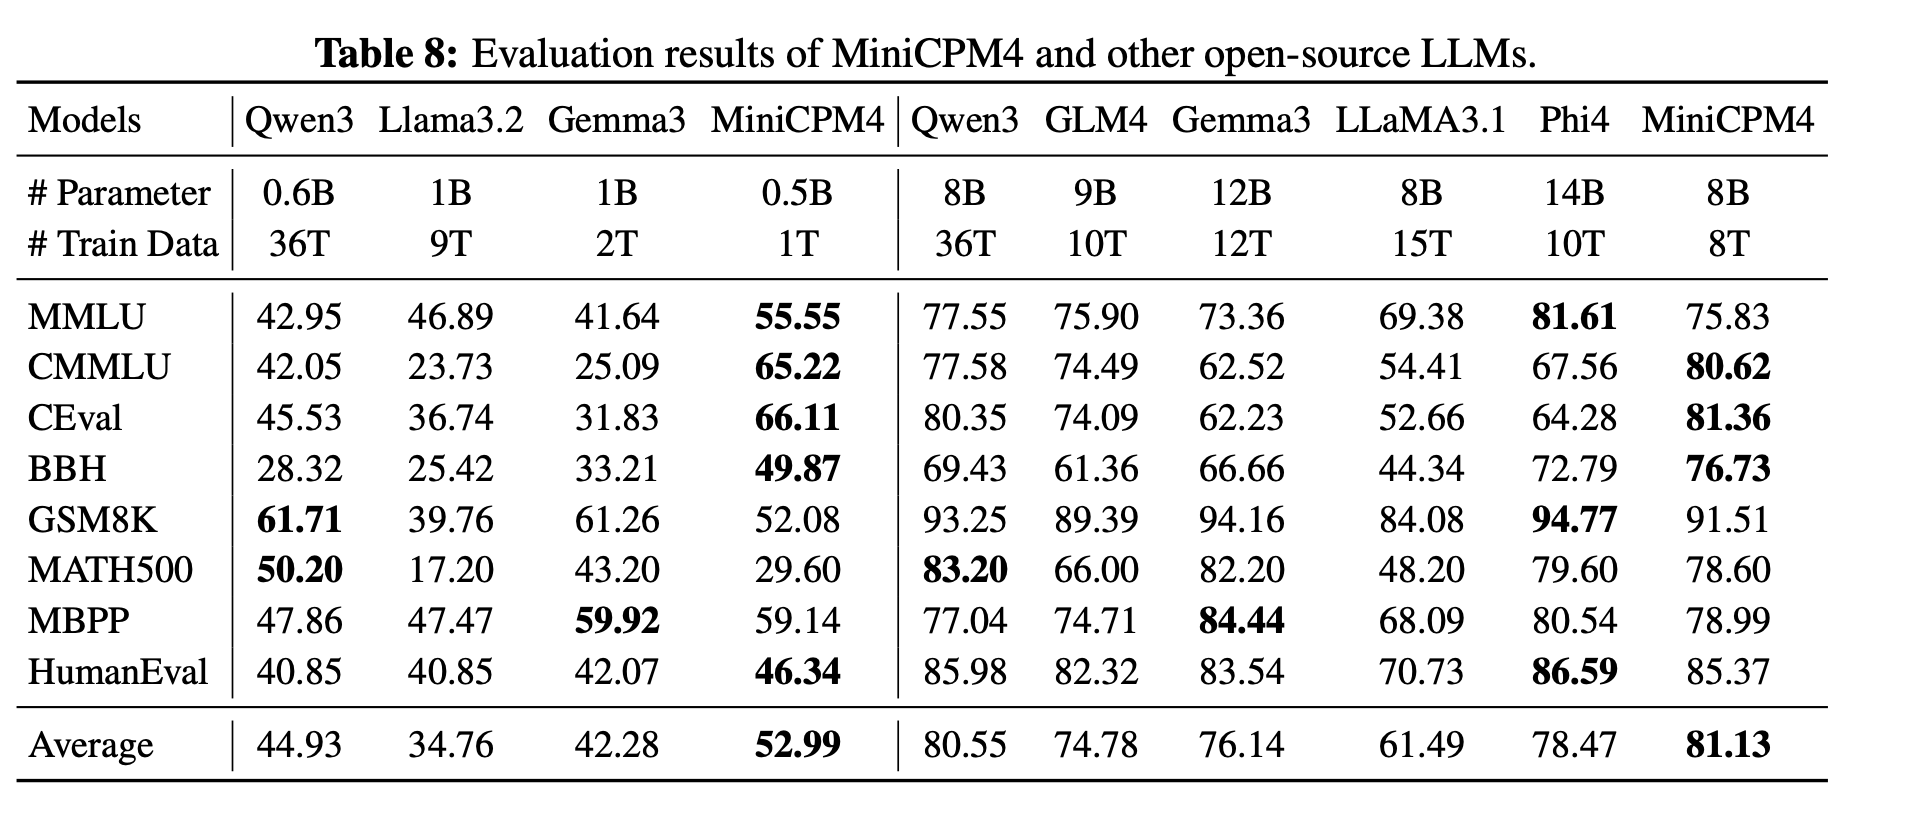
These scores match or beat models with twice as many parameters.
How to Run MiniCPM 4.1 on Spheron Network
Spheron Network gives you access to powerful GPUs without using traditional cloud providers like AWS or Google. You rent GPUs directly from providers worldwide. Let us walk you through the setup.
Step-by-Step Setup Guide
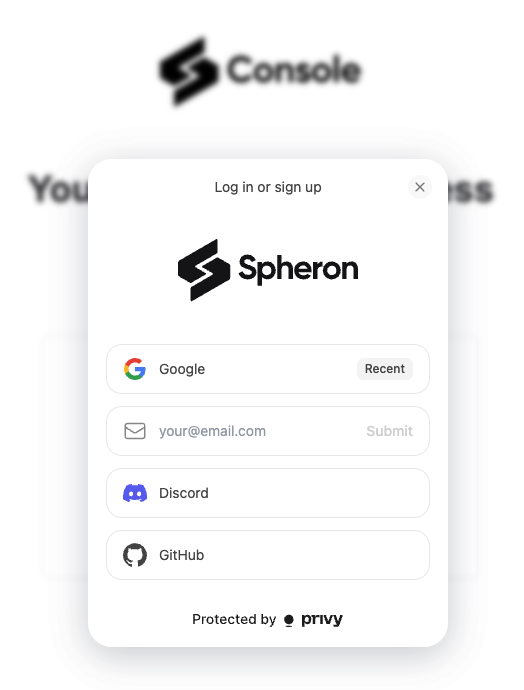
Step 1: Access Spheron Console and Add Credits
Head over to console.spheron.network and log in to your account. If you don’t have an account yet, create one by signing up with your Email/Google/Discord/GitHub.
Once logged in, navigate to the Deposit section. You’ll see two payment options:
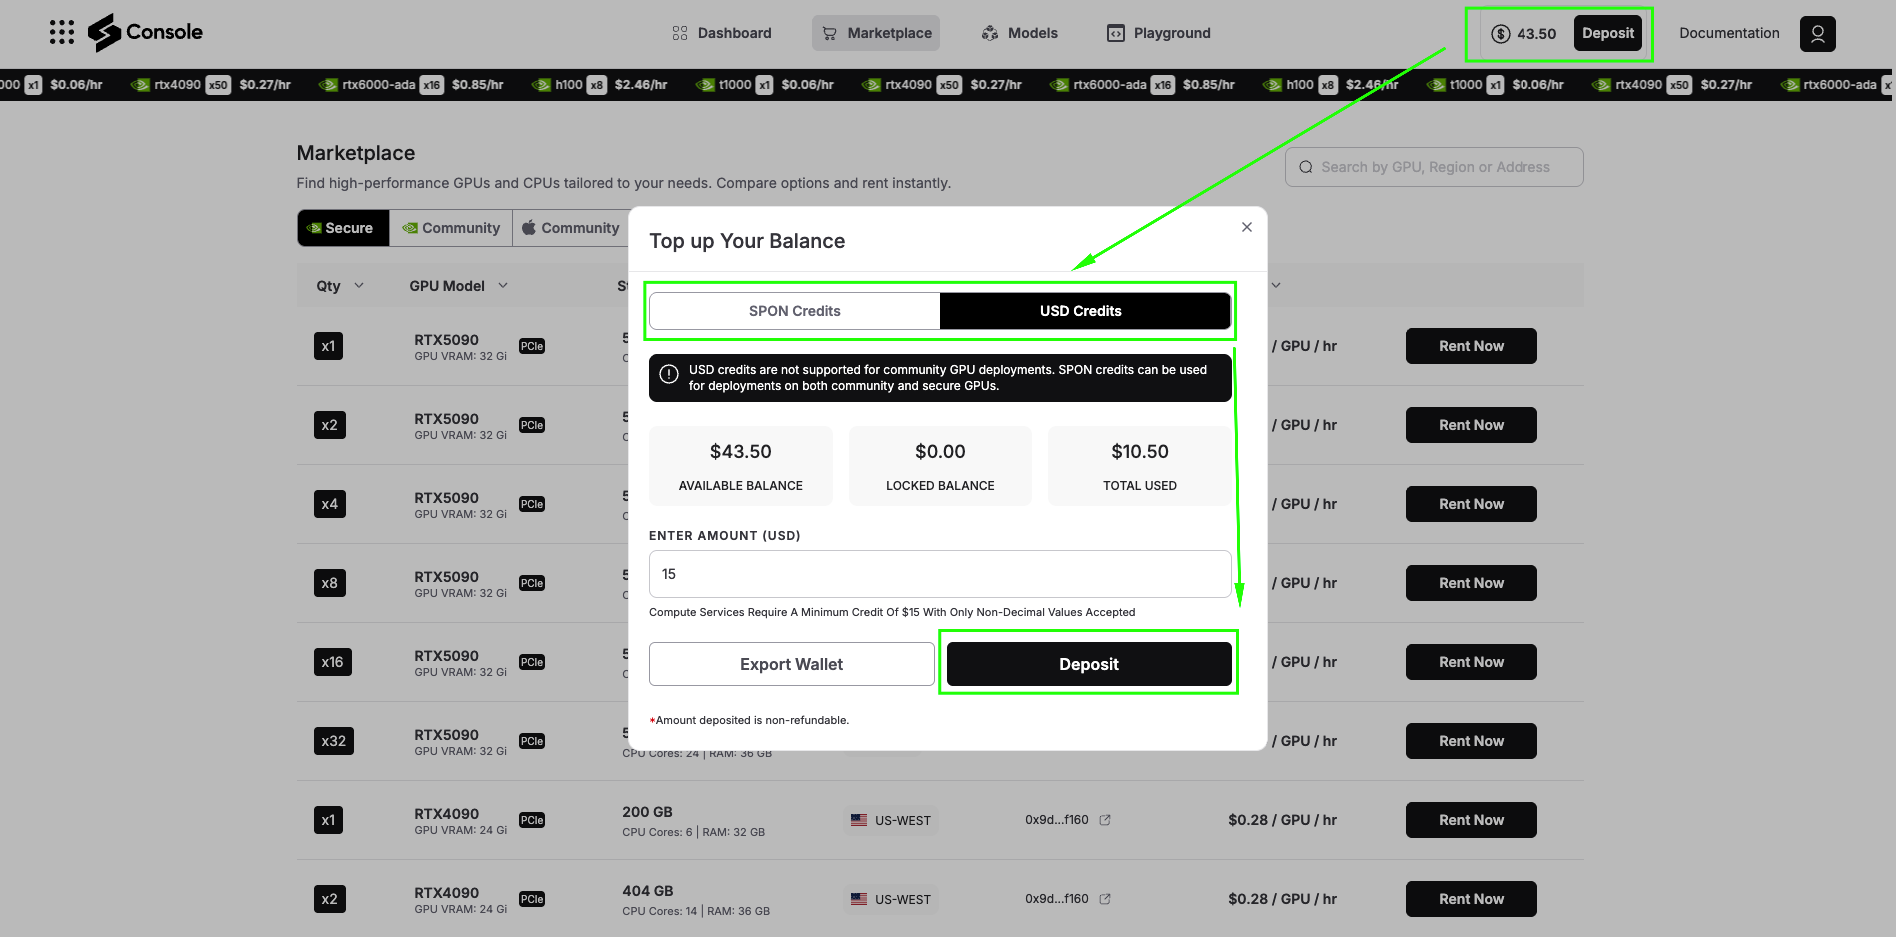
SPON Token: This is the native token of Spheron Network. When you deposit with SPON, you unlock the full power of the ecosystem. SPON credits can be used on both:
-
Community GPUs: Lower-cost GPU resources powered by community Fizz Nodes (personal machines and home setups)
-
Secure GPUs: Data center-grade GPU providers offering enterprise reliability
USD Credits: With USD deposits, you can deploy only on Secure GPUs. Community GPUs are not available with USD deposits.
For running NeuTTS, we recommend starting with Secure GPUs to ensure consistent performance. Add sufficient credits to your account based on your expected usage.
Step 2: Navigate to GPU Marketplace
After adding credits, click on Marketplace. Here you’ll see two main categories:
Secure GPUs: These run on data center-grade providers with enterprise SLAs, high uptime guarantees, and consistent performance. Ideal for production workloads and applications that require reliability.
Community GPUs: These run on community Fizz Nodes, essentially personal machines contributed by community members. They’re significantly cheaper than Secure GPUs but may have variable availability and performance.
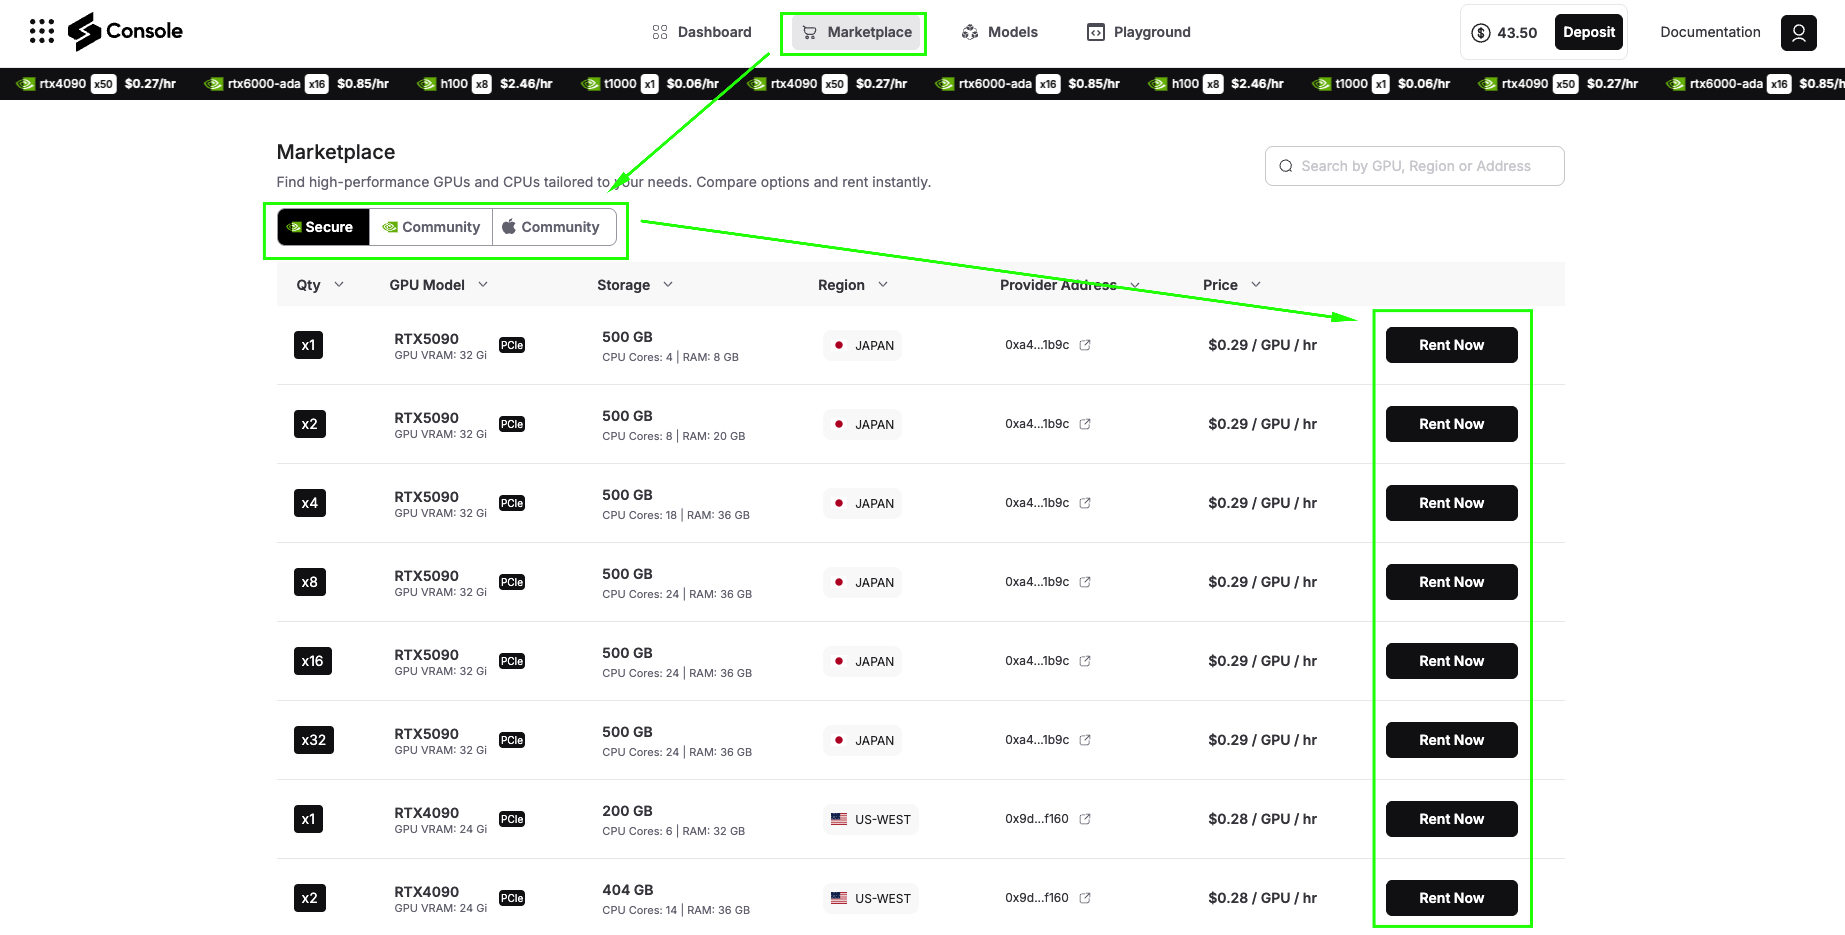
For this tutorial, we’ll use Secure GPUs to ensure smooth installation and optimal performance.
Step 3: Search and Select Your GPU
You can search for GPUs by:
-
Region: Find GPUs geographically close to your users
-
Address: Search by specific provider addresses
-
Name: Filter by GPU model (RTX 4090, A100, etc.)
For this demo, we’ll select a Secure RTX 4090 (or A6000 GPU), which has excellent performance for running NeuTTS. The 4090 provides the perfect balance of cost and capability for both testing and moderate production workloads.
Click Rent Now on your selected GPU to proceed to configuration.
Step 4: Select Custom Image Template
After clicking Rent Now, you’ll see the Rent Confirmation dialog. This screen shows all the configuration options for your GPU deployment. Let’s configure each section. Unlike pre-built application templates, running NeuTTS requires a customized environment for development capabilities. Select the configuration as shown in the image below and click “Confirm” to deploy.
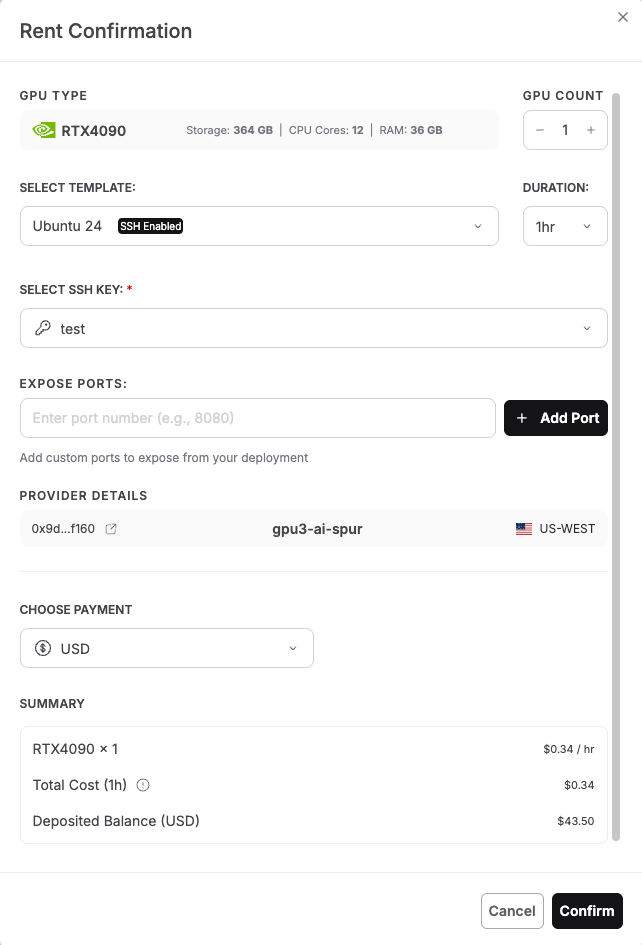
-
GPU Type: The screen displays your selected GPU (RTX 4090 in the image) with specifications: Storage, CPU Cores, RAM.
-
GPU Count: Use the + and – buttons to adjust the number of GPUs. For this tutorial, keep it at 1 GPU for cost efficiency.
-
Select Template: Click the dropdown that shows “Ubuntu 24” and look for template options. For running NeuTTS, we need an Ubuntu-based template with SSH enabled. You’ll notice the template shows an SSH-enabled badge, which is essential for accessing your instance via terminal. Select: Ubuntu 24 or Ubuntu 22 (both work perfectly)
-
Duration: Set how long you want to rent the GPU. The dropdown shows options like: 1hr (good for quick testing), 8hr, 24hr, or longer for production use. For this tutorial, select 1 hour initially. You can always extend the duration later if needed.
-
Select SSH Key: Click the dropdown to choose your SSH key for secure authentication. If you haven’t added an SSH key yet, you’ll see a message to create one.
-
Expose Ports: This section allows you to expose specific ports from your deployment. For basic command-line access, you can leave this empty. If you plan to run web services or Jupyter notebooks, you can add ports.
-
Provider Details: The screen shows provider information:
This shows which decentralized provider will host your GPU instance.
-
Scroll down to the Choose Payment section. Select your preferred payment option:
-
USD – Pay with traditional currency (credit card or other USD payment methods)
-
SPON: Pay with Spheron’s native token for potential discounts and access to both Community and Secure GPUs
-
The dropdown shows “USD” in the example, but you can switch to SPON if you have tokens deposited.
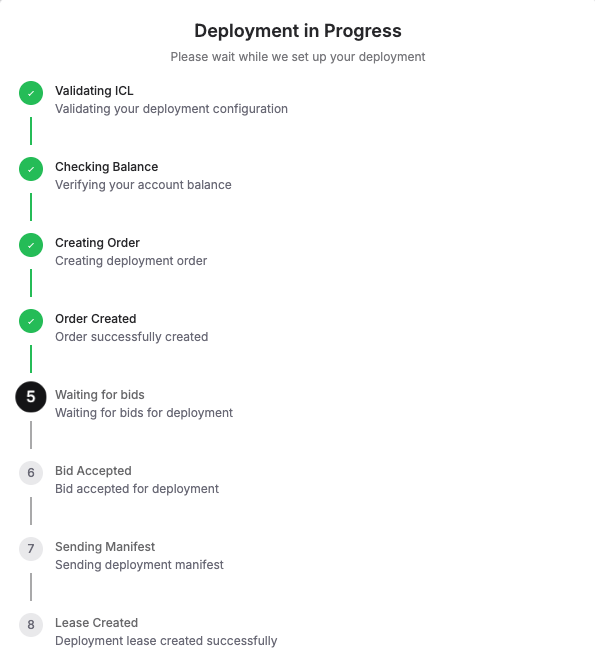
Step 5: Check the “Deployment in Progress“
Next, you’ll see a live status window showing every step of what’s happening, like: Validating configuration, Checking balance, Creating order, Waiting for bids, Accepting a bid, Sending manifest, and finally, Lease Created Successfully. Once this is complete, your Ubuntu server is live!
Deployment typically completes in under 60 seconds. Once you see “Lease Created Successfully,” your Ubuntu server with GPU access is live and ready to use!
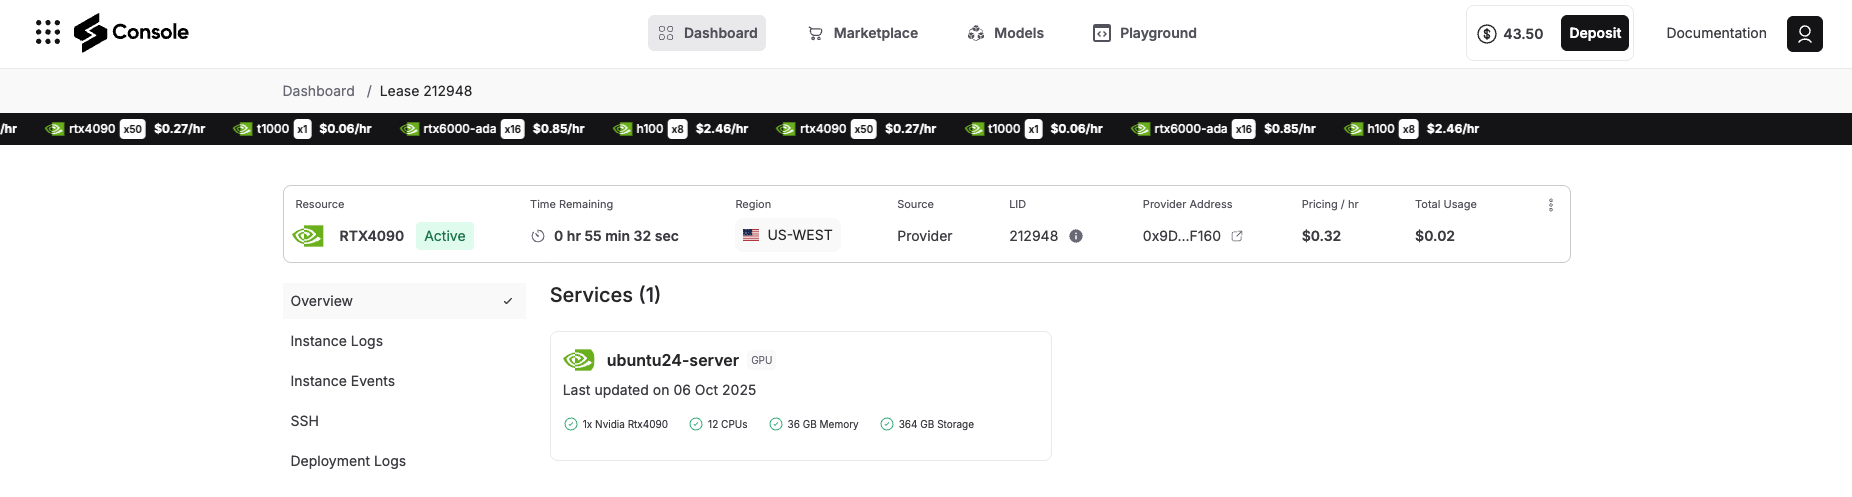
Step 6: Access Your Deployment
Once deployment completes, navigate to the Overview tab in your Spheron console. You’ll see your deployment listed with:
-
Status: Running
-
Provider details: GPU location and specifications
-
Connection information: SSH access details
-
Port mappings: Any exposed services
Step 7: Connect via SSH
Click the SSH tab, and you will see the steps on how to connect your terminal via SSH to your deployment details. It will look something like the image below, follow it:
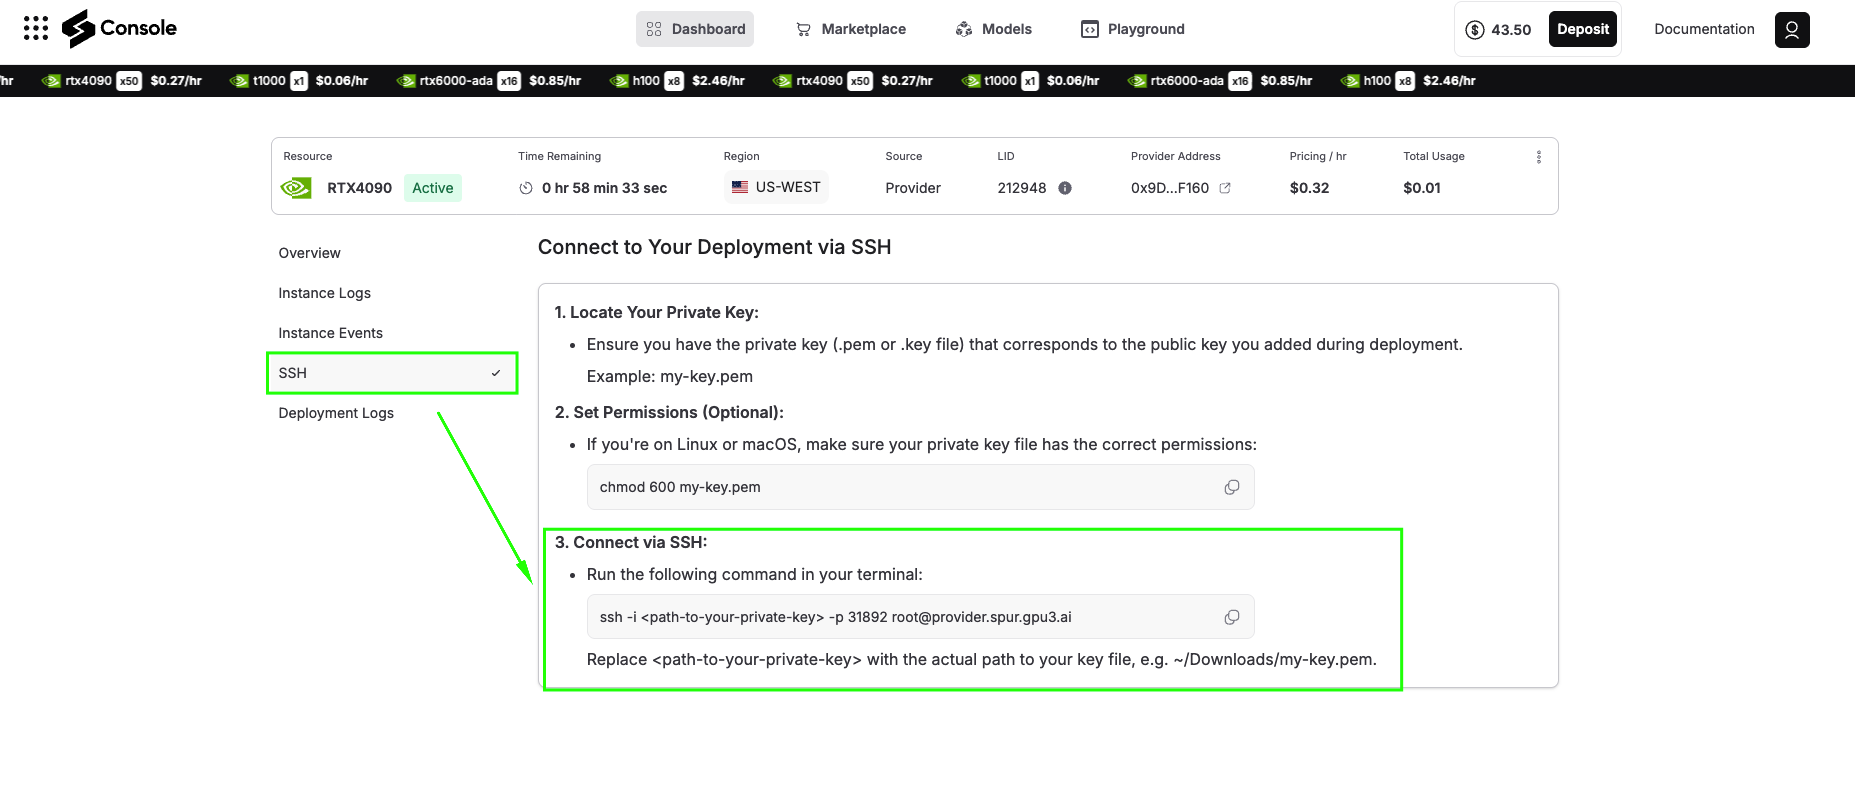
ssh -i -p root@
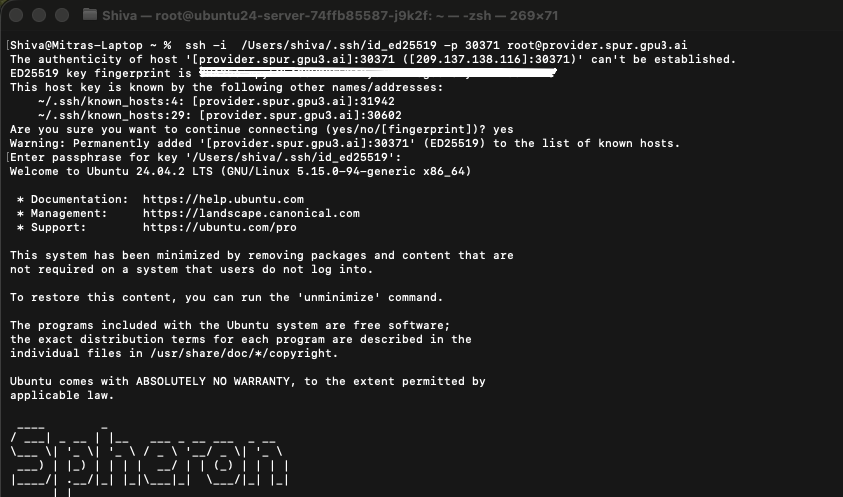
Open your terminal and paste this command. Upon your first connection, you’ll see a security prompt requesting that you verify the server’s fingerprint. Type “yes” to continue. You’re now connected to your GPU-powered virtual machine on the Spheron decentralized network.
Step 8: Install Miniconda
We’ll install Miniconda to manage Python environments cleanly.
This will make it easier to isolate dependencies for MiniCPM.
wget https://repo.anaconda.com/miniconda/Miniconda3-latest-Linux-x86_64.sh -O ~/miniconda.sh

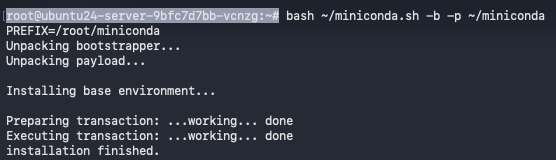
Run the installer silently (no prompts):
bash ~/miniconda.sh -b -p ~/miniconda
Initialize conda for bash:
~/miniconda/bin/conda init bash

Step 9: Create and Activate the Conda Environment
We’ll now create a new environment for MiniCPM and activate it, and Reloadthe shell so conda works right away:
source ~/.bashrc
conda create -n minicpm python=3.11 -y && conda activate minicpm
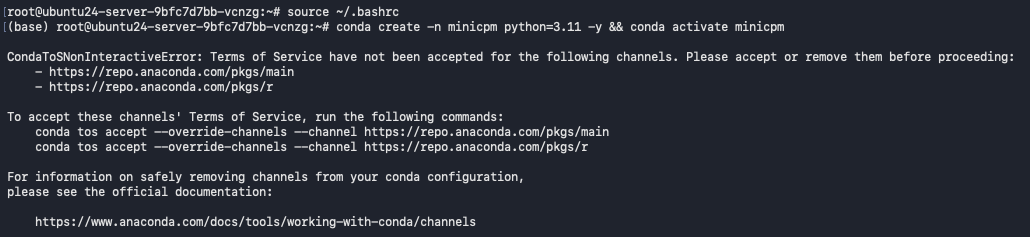
Accept Conda’s Terms of Service to avoid setup interruptions:
conda tos accept --override-channels --channel https://repo.anaconda.com/pkgs/main
conda tos accept --override-channels --channel https://repo.anaconda.com/pkgs/r

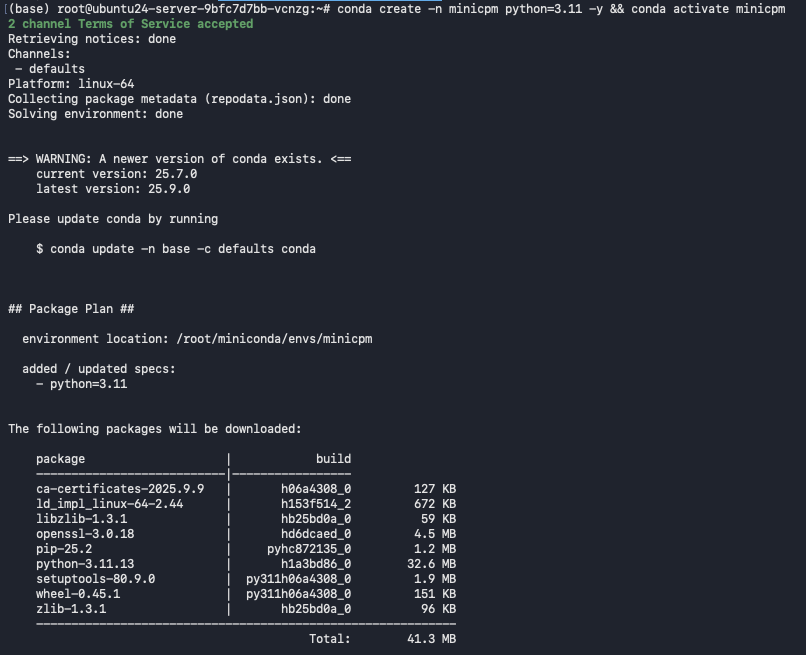
Recreate and activate just to make sure:
conda create -n minicpm python=3.11 -y && conda activate minicpm
If conda path issues appear, use this:
source /root/miniconda/etc/profile.d/conda.sh && conda activate

Step 10: Install Dependencies
Now we’ll install all necessary packages, PyTorch, transformers, accelerate, and a few utilities.
Install GPU-enabled PyTorch (CUDA 12.1):
pip install torch>=2.0.0 --index-url https://download.pytorch.org/whl/cu121

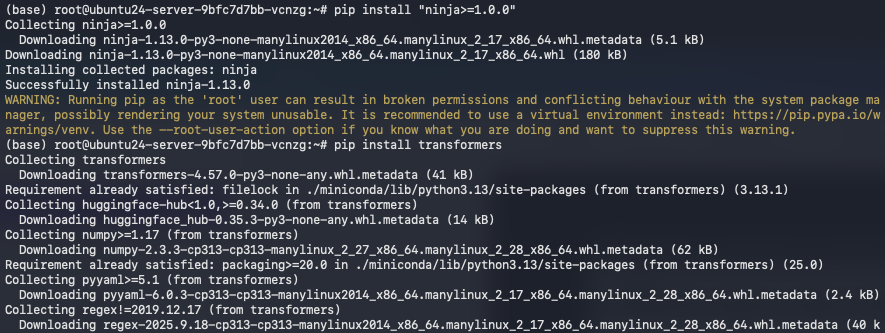
Install build tools and libraries:
pip install "ninja>=1.0.0"
pip install transformers
pip install accelerate==0.26.0
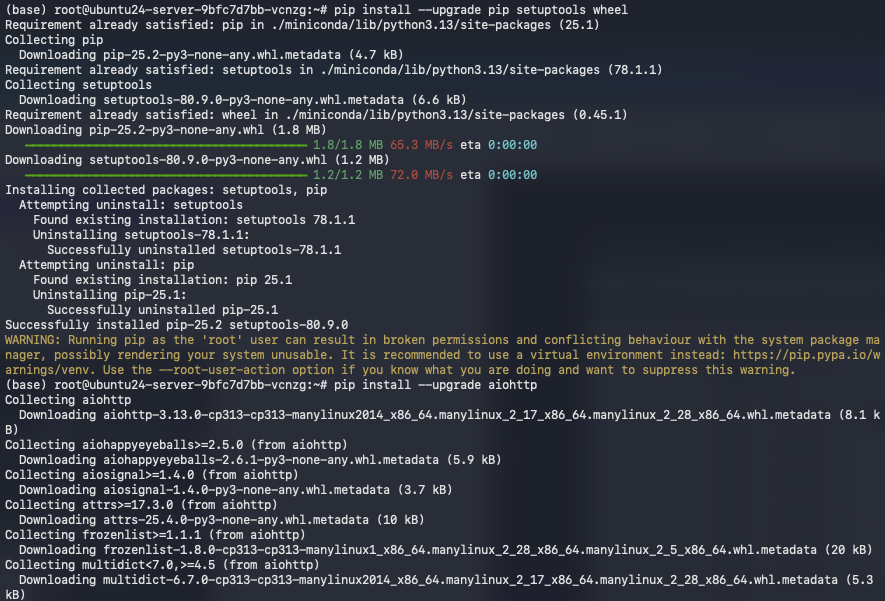
pip install --upgrade pip setuptools wheel
pip install --upgrade aiohttp

Step 11: Install Git and Clone the CPM.cu Repo
We’ll now clone the OpenBMB CPM.cu repository, which contains the custom CUDA inference backend for MiniCPM models.
apt update && apt install -y git

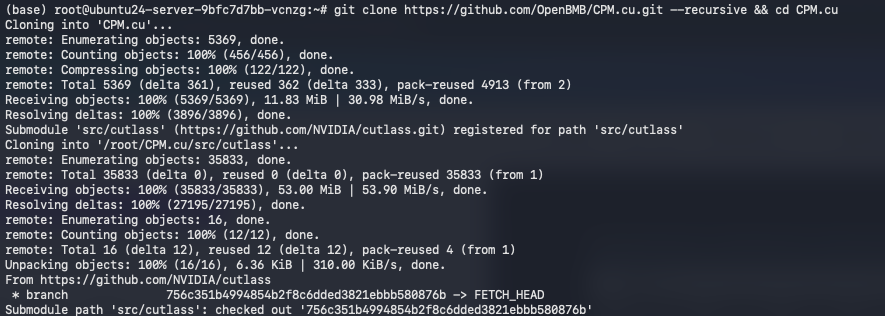
Clone the repo (with submodules):
git clone https://github.com/OpenBMB/CPM.cu.git --recursive && cd CPM.cu
Step 12: Set Up CUDA and Build CPM.cu
We’ll install CUDA Toolkit and build the CPM.cu backend.
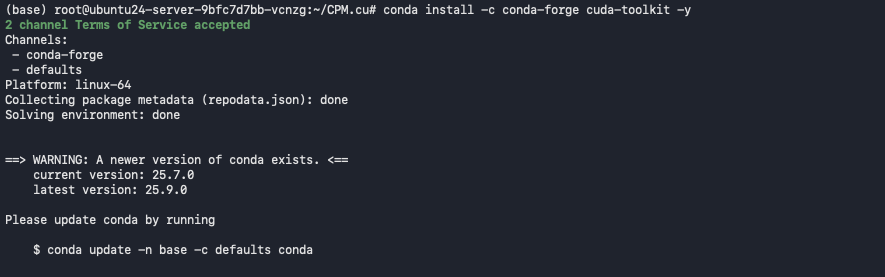
Install CUDA toolkit:
conda install -c conda-forge cuda-toolkit -y
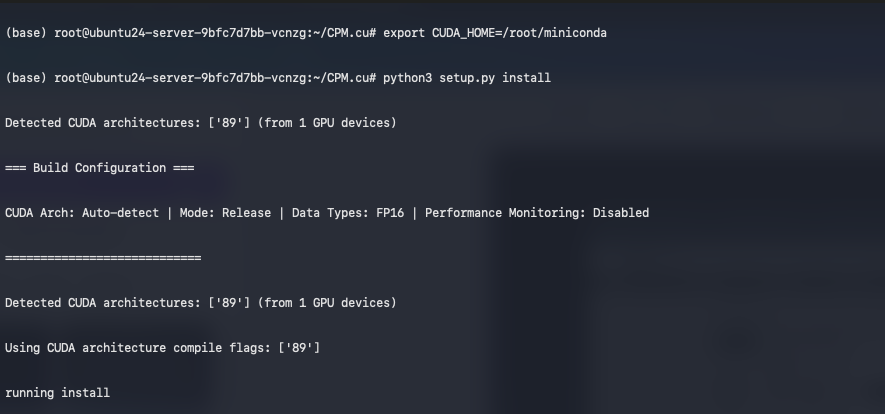
Set the CUDA environment path, Build and install CPM.cu:
export CUDA_HOME=/root/miniconda
python3 setup.py install
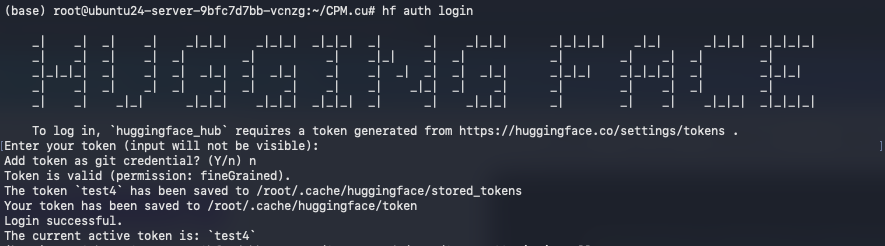
Step 13: Log in to Hugging Face
You need to authenticate to download MiniCPM model weights.
This opens a Hugging Face login prompt.
When prompted, paste your Hugging Face access token. If you don’t have a token yet:
-
Click “New token”
-
Select “Read” permissions (sufficient for downloading models)
-
Name it something memorable like “MiniCPM4.1”
-
Copy the token and paste it when the terminal prompts you
After successful authentication, you’ll see a confirmation message.
hf auth login
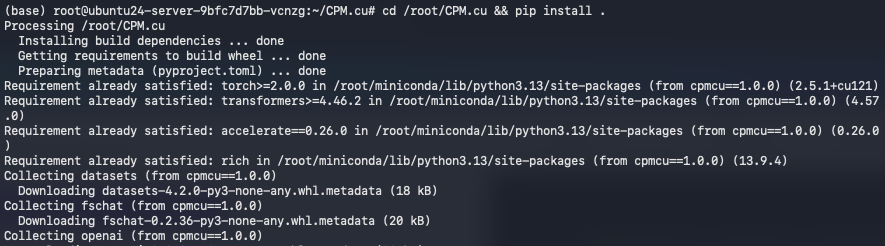
Step 14: Install the CPM.cu Python Package
Make sure the package is installed properly so Python can import it.
cd /root/CPM.cu && pip install .
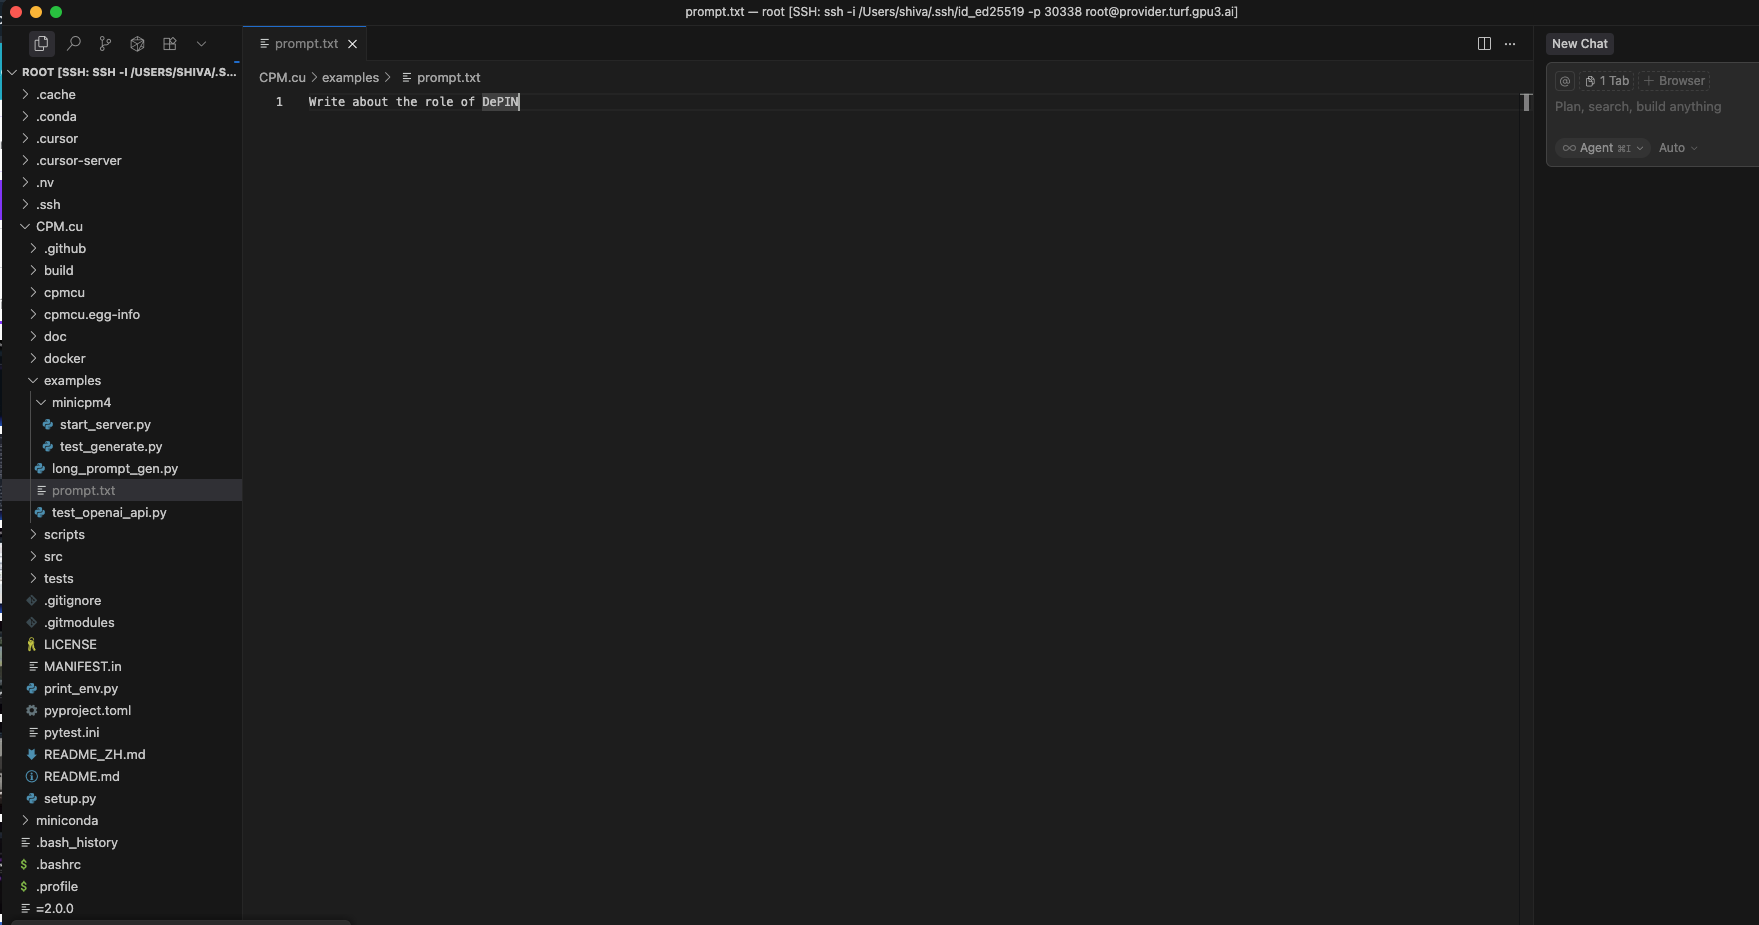
Step 15: Connecting a Code Editor
Connect your GPU VM by running the same command you have used to connect your GPU in the terminal.
ssh -i -p root@
Now go to the CPM.cu folder > examples > Create a file named prompt.txt. In prompt.txt, you can add your prompt, which you want to run through MiniCPM 4.1. Save the file and go back to the terminal.
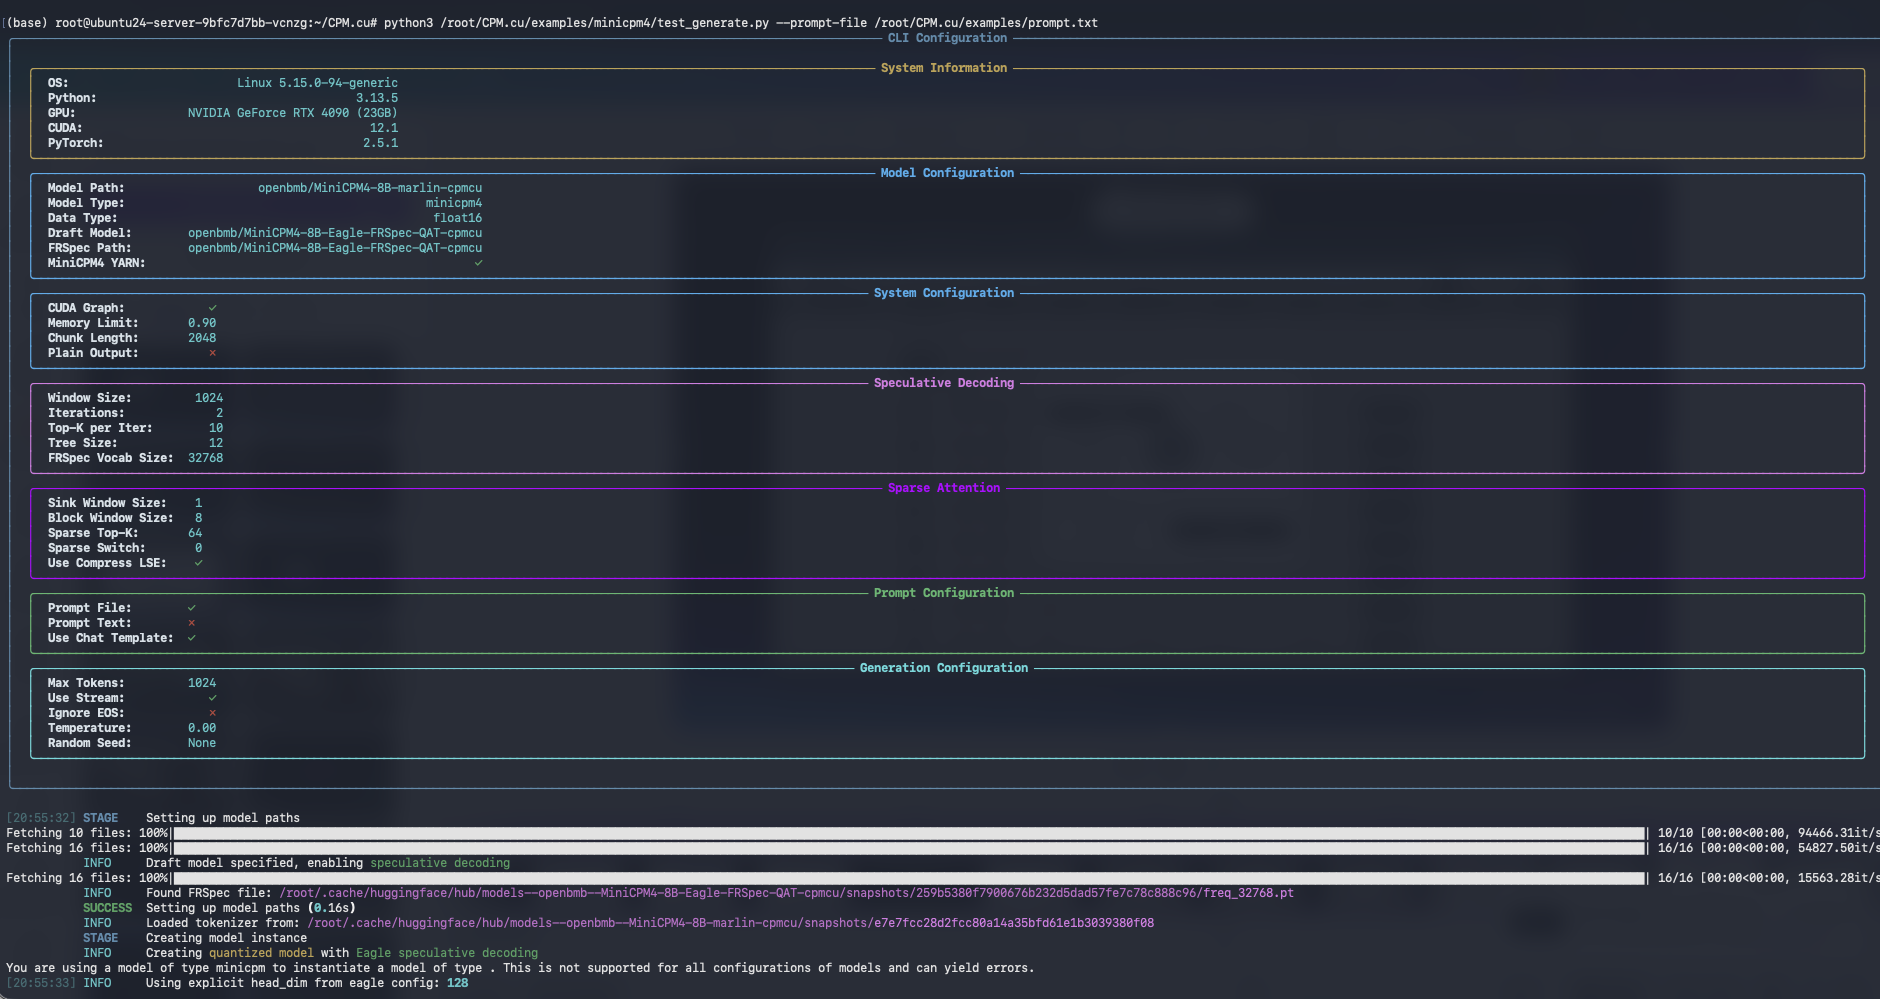
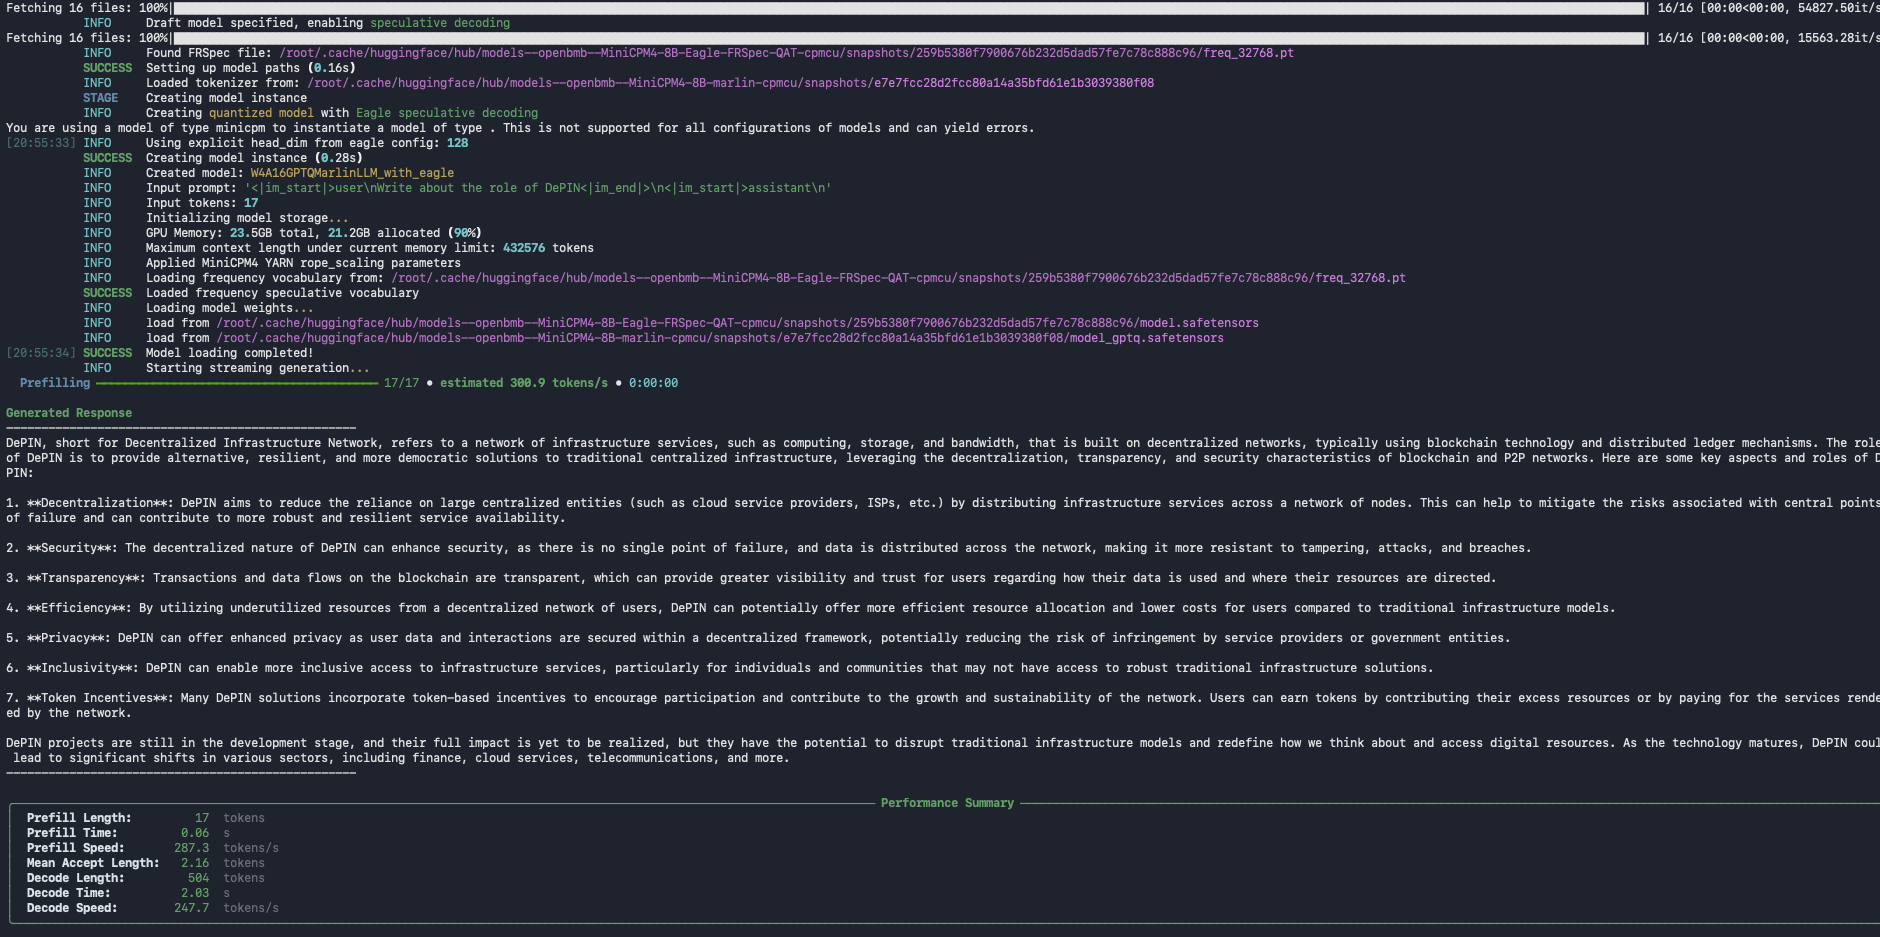
Step 16: Run the MiniCPM Inference Demo
Now, everything’s ready. Let’s test MiniCPM 4.1-8B with a sample prompt.
This runs the example inference script included in CPM.cu.
python3 /root/CPM.cu/examples/minicpm4/test_generate.py --prompt-file /root/CPM.cu/examples/prompt.txt
This will load the MiniCPM model, generate text for the prompt, and print results in the terminal.
You’ve successfully deployed MiniCPM 4.1-8B on a Spheron decentralized GPU. You now have:
-
A fully local, private inference environment
-
A lightweight, efficient LLM runtime
-
Access to the CPM.cu CUDA backend for max GPU efficiency.
Conclusion
MiniCPM-4.1-8B proves that efficiency and power can go hand in hand, delivering state-of-the-art performance through innovations in architecture, training, data, and inference while remaining lightweight enough for local or GPU-based deployment. With the help of CPM.cu, users can unlock the model’s full potential by leveraging optimized sparse attention, quantization, and CUDA-based acceleration. Spheron Network makes this entire journey seamless by providing decentralized, cost-efficient GPU infrastructure, simplifying deployment, scaling, and environment management. Developers can now focus on rapid experimentation and results with pre-configured, GPU-powered by Spheron’s global compute network.