
olmOCR 2 is an open-source tool designed for high-throughput conversion of PDFs and other documents into plain text while preserving natural reading order. It supports tables, equations, handwriting, and more.
olmOCR 2 has been trained on a highly curated set of academic papers, technical documentation, and other reference content; the latest version uses synthetic data and unit tests as verifiable rewards for reinforcement learning to further decrease hallucinations. For full details on the recipe, read our technical report. The current model was fine-tuned on English documents using a multilingual base VLM; other languages may work.
The olmOCR pipeline v0.4.0 was evaluated on the olmOCR-bench using two model variants: olmOCR-2-7B-1025 and olmOCR-2-7B-1025-FP8. Their scores across various document categories are as follows:
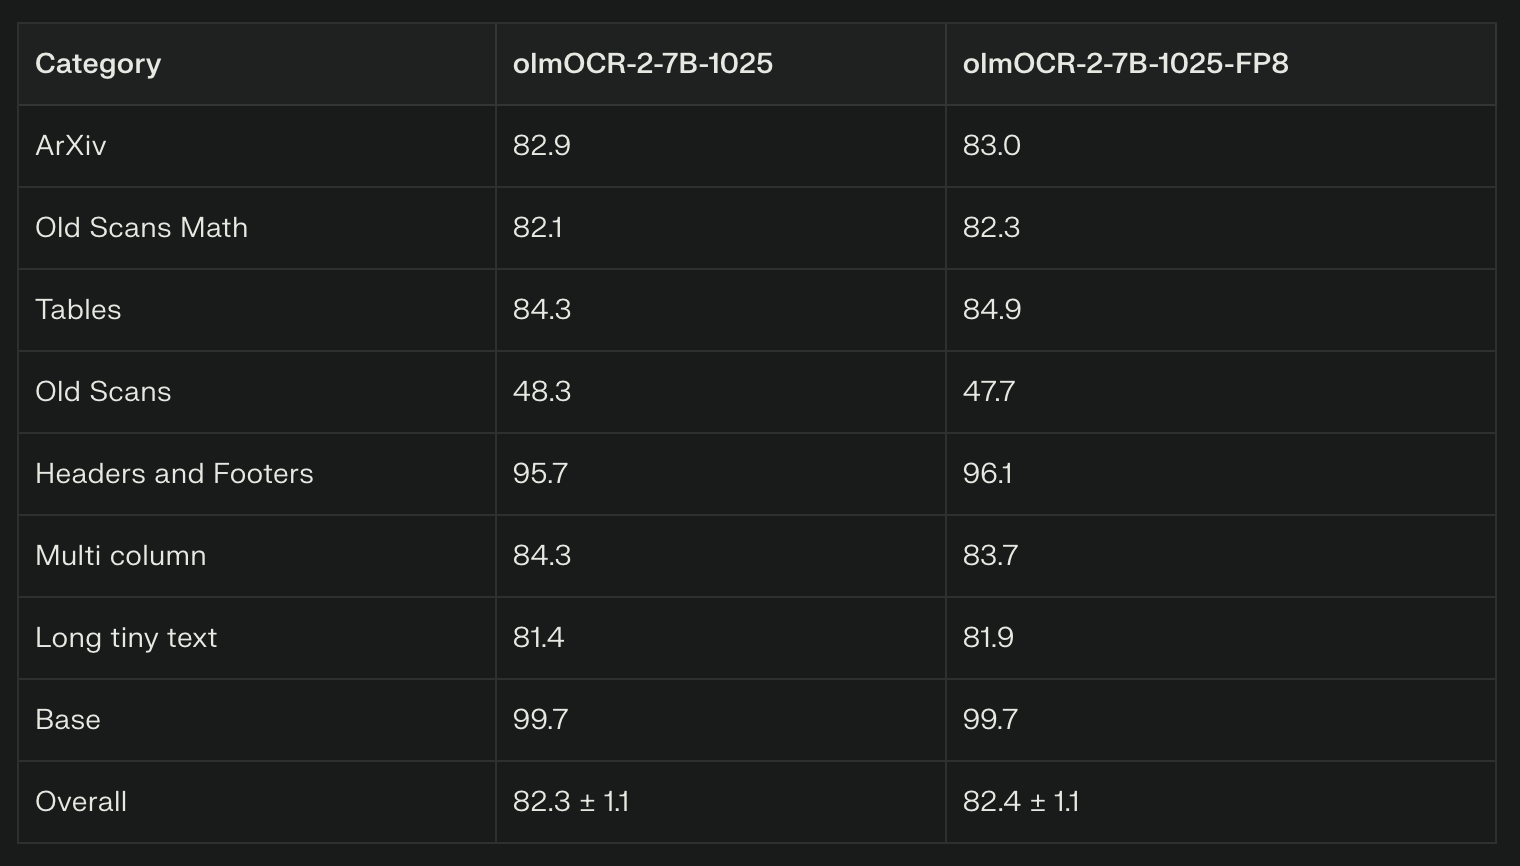
The two models show very close performance, with minor variations in certain categories. Both models excel particularly in Headers and Footers, and Base document categories with scores near or above 95. The Old Scans category shows the lowest scores in the high 40s. The FP8 model variant achieves a slight edge in overall and some specific category scores like Tables and Headers/Footers, but the differences are marginal.
-
FP8 weights with BF16 compute deliver practical efficiency, with multiple GPU configurations supported. For example, consumer GPUs with 8 to 24 GB VRAM can run these models with suitable batch sizes.
-
Large-scale production setups use A100 or H100 GPUs with 40–80 GB VRAM, enabling higher batch throughput.
-
Recommended usage includes enabling paged KV cache, setting maximum sequences to batch size, and utilizing modern attention mechanisms like flash attention.
-
Pre/post-processing uses image sizing and rotation retries, automation handled by the olmOCR toolkit for best accuracy.
-
PDFs must be rasterized to images per page. The toolkit automatically applies document-anchoring (extracting text blocks, positions, and images from PDF internals) to reduce hallucinations, which is crucial for born-digital PDFs. For scans without metadata, it falls back to pure visual processing.
-
Prompting and Output: Use the simplified prompt from the paper (Appendix E.2) with {base_text} replaced by anchored content. Outputs are structured JSON (e.g., natural_text field for linearized Markdown/LaTeX). Enforce retries (up to 3 times) for repetitions or schema failures; increase the temperature to 0.8 if necessary.
-
Limitations: Best for English-dominant PDFs; may struggle with extreme rotations (auto-detected via JSON fields) or non-text-heavy pages (e.g., diagrams, output null if no readable text. Decontamination applied against PII, but manual review is advised for sensitive data.
-
Scaling and Cost: Optimized for large batches (500+ pages per work item); coordinate multi-GPU via cloud buckets (e.g., S3). Inference throughput: ~906 tokens/sec on L40S (with 12% retry rate). Avoid schema-constrained decoding to prevent out-of-domain generations.

-
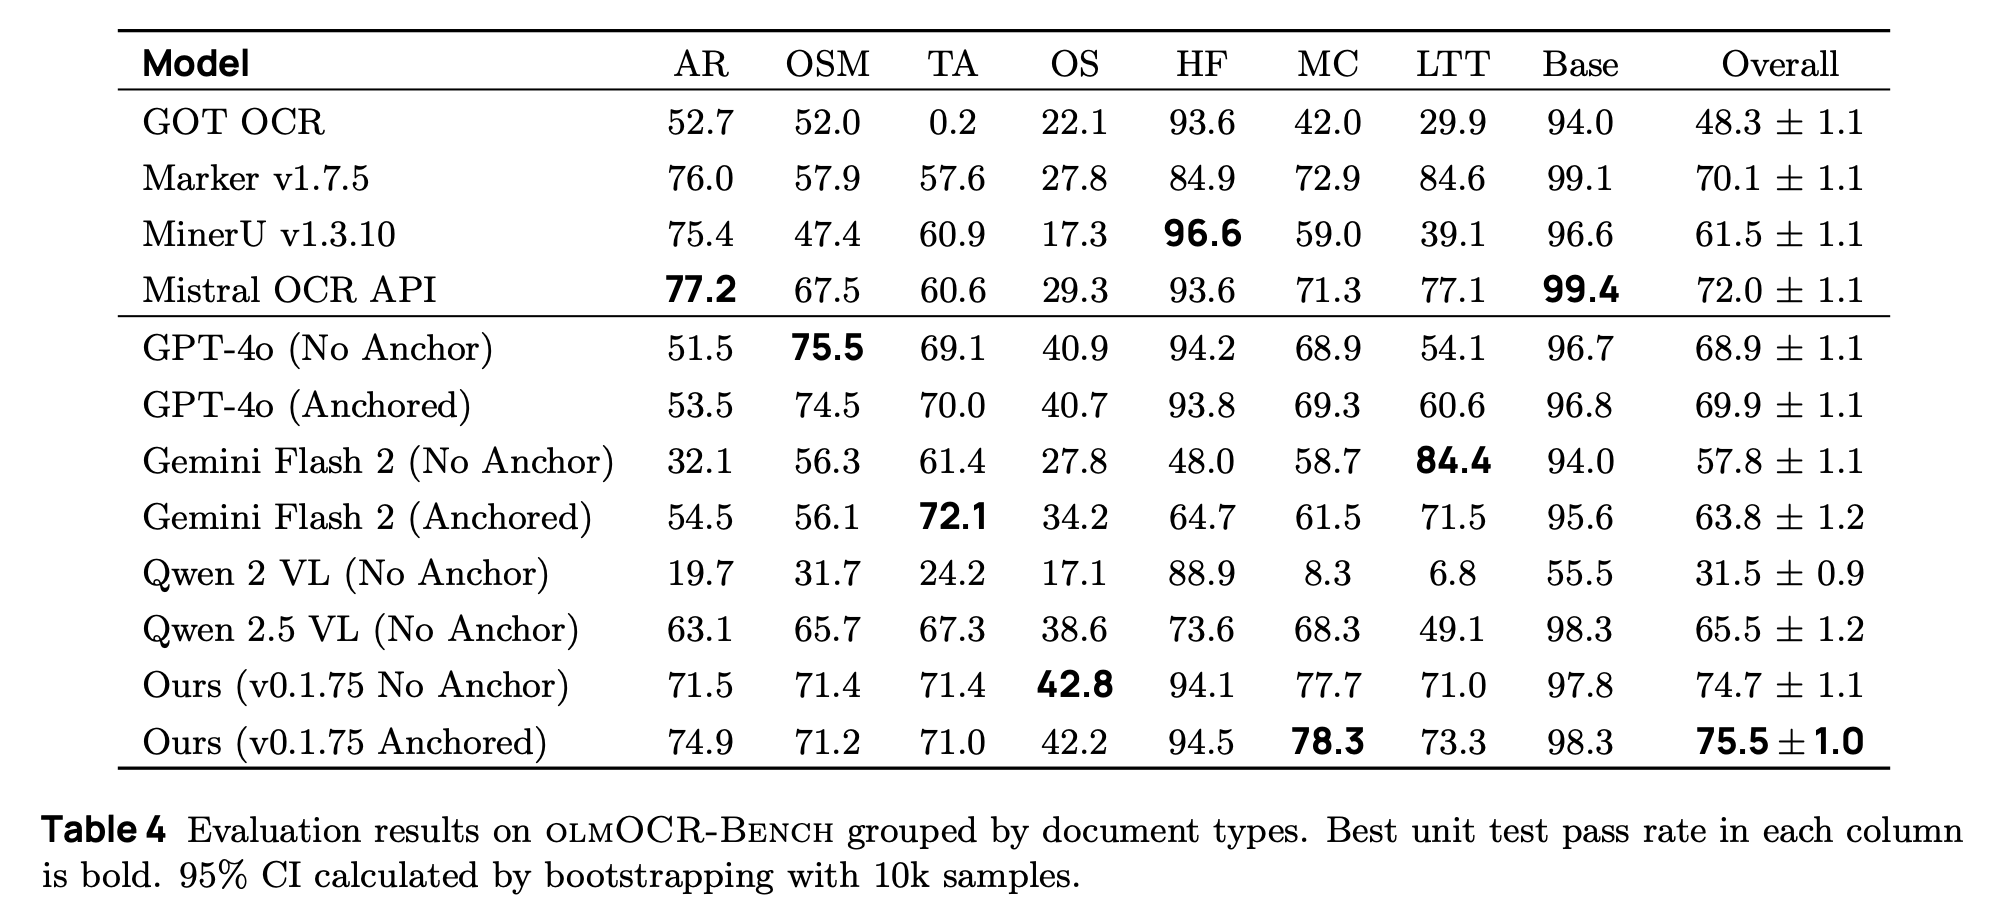
Evaluation and Fine-Tuning: Test your setup on the olmOCR-Bench. Training code released, use Hugging Face Transformers with batch size 4, LR 1e-6, for ~16 H100 hours per run. olmOCR-Bench Scores From paper Table 4; evaluated with olmOCR toolkit (v0.1.75, anchored mode) for reliable comparisons.
Recommended Flags / Tips
-
Inference Engines: Prefer SGLang for throughput (–port 30000, –model-path allenai/olmOCR-7B-0225-preview); fallback to vLLM (–trust-remote-code, –dtype bfloat16). Set max_tokens=8192; cap anchor text at 6000 chars.
-
Toolkit Usage: Install via pip install olmocr; run olmocr convert input.pdf –output output.md for single files. For batches: olmocr batch
How to Run olmOCR-2-7B-1025-FP8 on Spheron Network
Spheron Network gives you access to powerful GPUs without using traditional cloud providers like AWS or Google. You rent GPUs directly from providers worldwide. Let us walk you through the setup.
Step-by-Step Setup Guide
Step 1: Access Spheron Console and Add Credits
Head over to console.spheron.network and log in to your account. If you don’t have an account yet, create one by signing up with your Email/Google/Discord/GitHub.

Once logged in, navigate to the Deposit section. You’ll see two payment options:
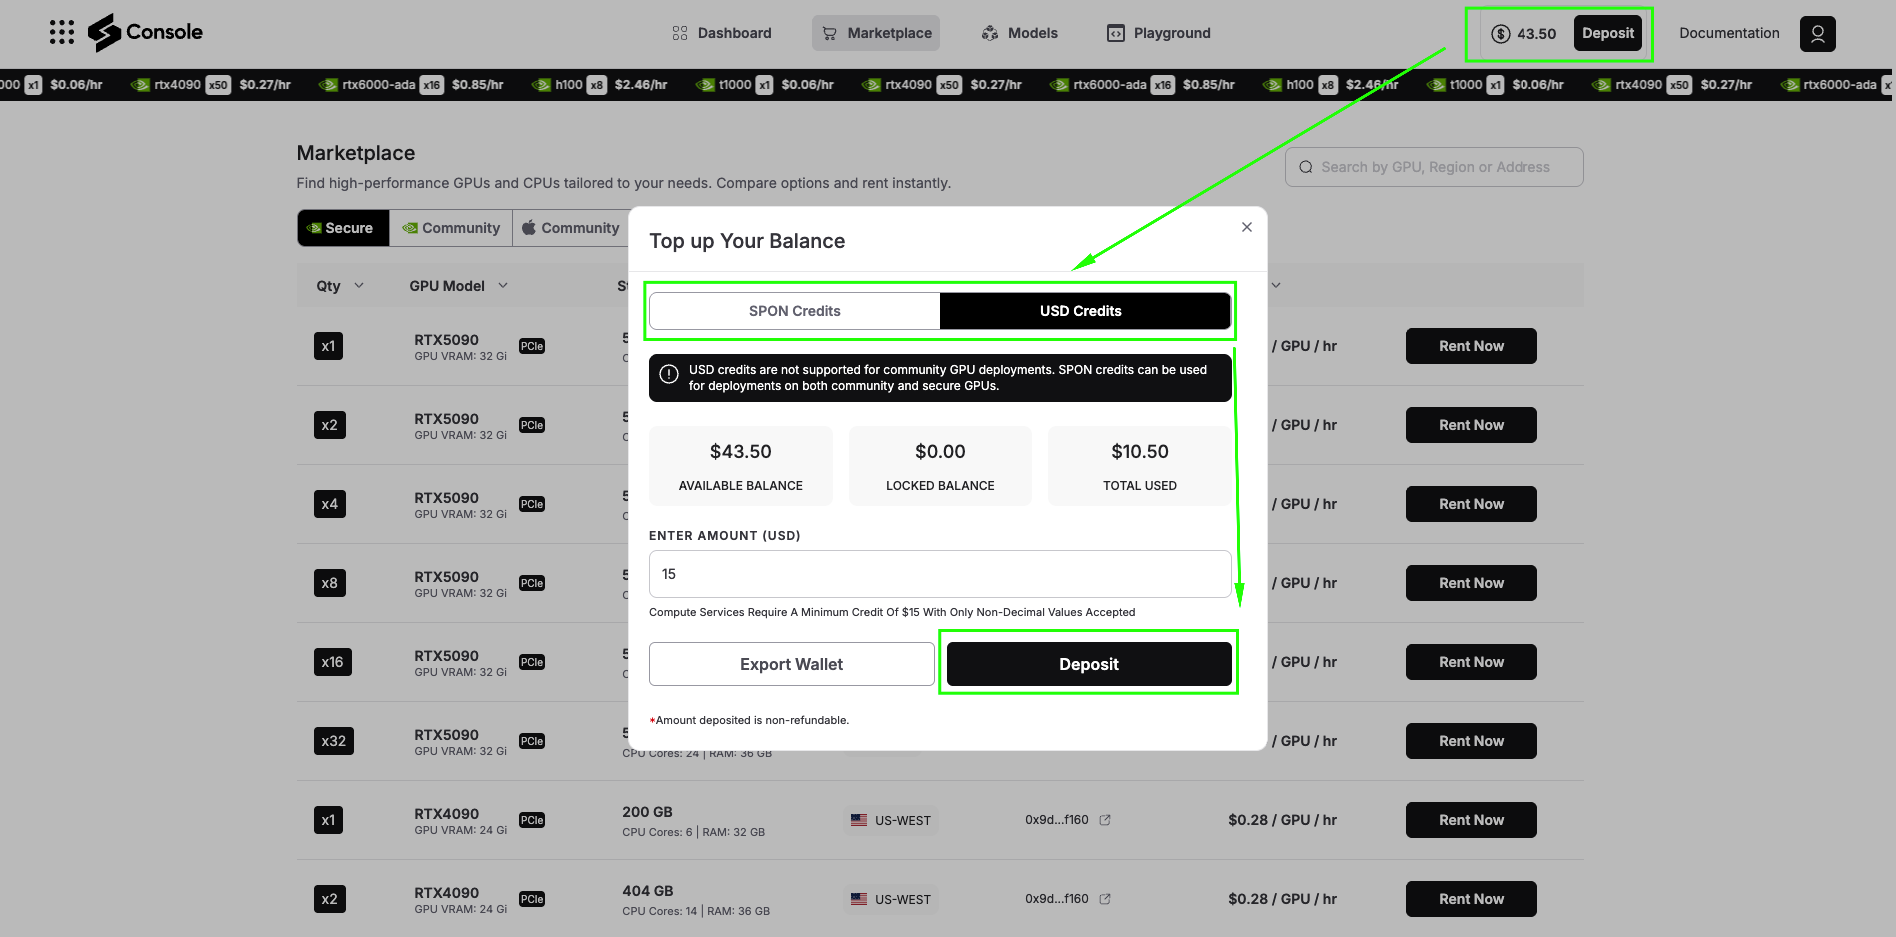
SPON Token: This is the native token of Spheron Network. When you deposit with SPON, you unlock the full power of the ecosystem. SPON credits can be used on both:
-
Community GPUs: Lower-cost GPU resources powered by community Fizz Nodes (personal machines and home setups)
-
Secure GPUs: Data center-grade GPU providers offering enterprise reliability
USD Credits: With USD deposits, you can deploy only on Secure GPUs. Community GPUs are not available with USD deposits.
For running olmOCR, we recommend starting with Secure GPUs to ensure consistent performance. Add sufficient credits to your account based on your expected usage.
Step 2: Navigate to GPU Marketplace
After adding credits, click on Marketplace. Here you’ll see two main categories:
Secure GPUs: These run on data center-grade providers with enterprise SLAs, high uptime guarantees, and consistent performance. Ideal for production workloads and applications that require reliability.
Community GPUs: These run on community Fizz Nodes, essentially personal machines contributed by community members. They’re significantly cheaper than Secure GPUs but may have variable availability and performance.

For this tutorial, we’ll use Secure GPUs to ensure smooth installation and optimal performance.
Step 3: Search and Select Your GPU
You can search for GPUs by:
-
Region: Find GPUs geographically close to your users
-
Address: Search by specific provider addresses
-
Name: Filter by GPU model (RTX 4090, A100, etc.)
For this demo, we’ll select a Secure RTX 4090 (or A6000 GPU), which has excellent performance for running olmOCR. The 4090 provides the perfect balance of cost and capability for both testing and moderate production workloads.
Click Rent Now on your selected GPU to proceed to configuration.
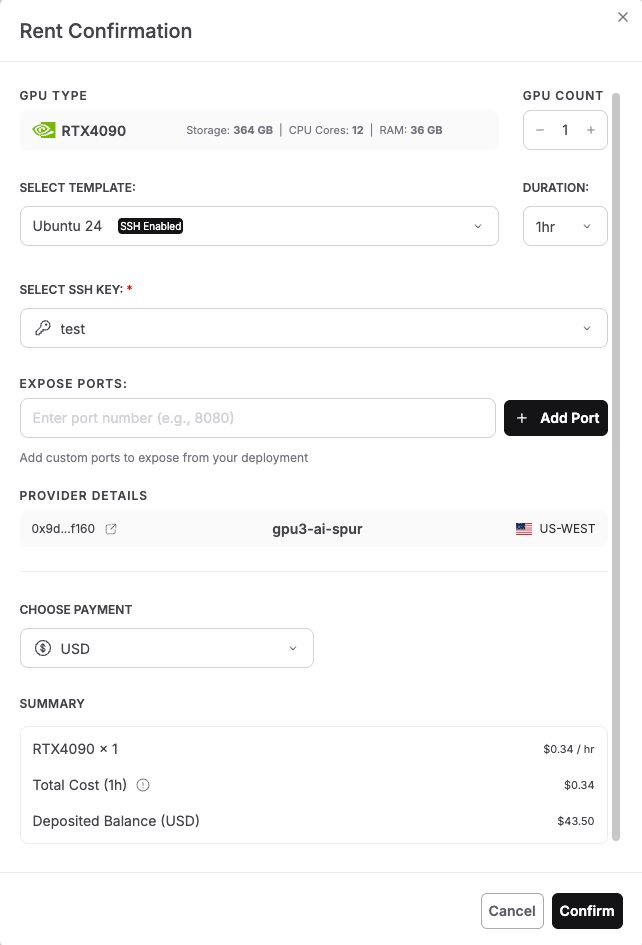
Step 4: Select Custom Image Template
After clicking Rent Now, you’ll see the Rent Confirmation dialog. This screen shows all the configuration options for your GPU deployment. Let’s configure each section. Unlike pre-built application templates, running olmOCR requires a customized environment to leverage its development capabilities. Select the configuration as shown in the image below and click “Confirm” to deploy.
-
GPU Type: The screen displays your selected GPU (RTX 4090 in the image), along with its specifications: Storage, CPU Cores, and RAM.
-
GPU Count: Use the + and – buttons to adjust the number of GPUs. For this tutorial, use 1 GPU for cost efficiency.
-
Select Template: Click the dropdown that shows “Ubuntu 24” and look for template options. To run olmOCR, we require an Ubuntu-based template with SSH enabled. You’ll notice the template shows an SSH-enabled badge, which is essential for accessing your instance via terminal. Select: Ubuntu 24 or Ubuntu 22 (both work perfectly)
-
Duration: Specify the duration for which you want to rent the GPU. The dropdown shows options like 1 hour (good for quick testing), 8 hours, 24 hours, or longer for production use. For this tutorial, select 1 hour initially. You can always extend the duration later if needed.
-
Select SSH Key: Click the dropdown to choose your SSH key for secure authentication. If you haven’t added an SSH key yet, you’ll see a message to create one.
-
Expose Ports: This section allows you to expose specific ports from your deployment. For basic command-line access, you can leave this empty. If you plan to run web services or Jupyter notebooks, you can add ports.
-
Provider Details: The screen shows provider information:
This shows which decentralized provider will host your GPU instance.
-
Scroll down to the Choose Payment section. Select your preferred payment option:
-
USD – Pay with traditional currency (credit card or other USD payment methods)
-
SPON: Pay with Spheron’s native token for potential discounts and access to both Community and Secure GPUs
-
The dropdown shows “USD” in the example, but you can switch to SPON if you have tokens deposited.
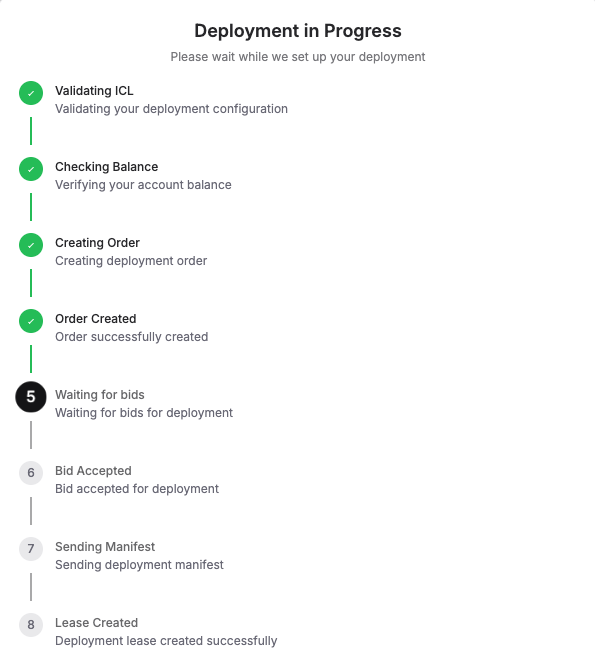
Step 5: Check the “Deployment in Progress“
Next, you’ll see a live status window showing every step of what’s happening, like: Validating configuration, Checking balance, Creating order, Waiting for bids, Accepting a bid, Sending manifest, and finally, Lease Created Successfully. Once this is complete, your Ubuntu server is live!
Deployment typically completes in under 60 seconds. Once you see “Lease Created Successfully,” your Ubuntu server with GPU access is live and ready to use!
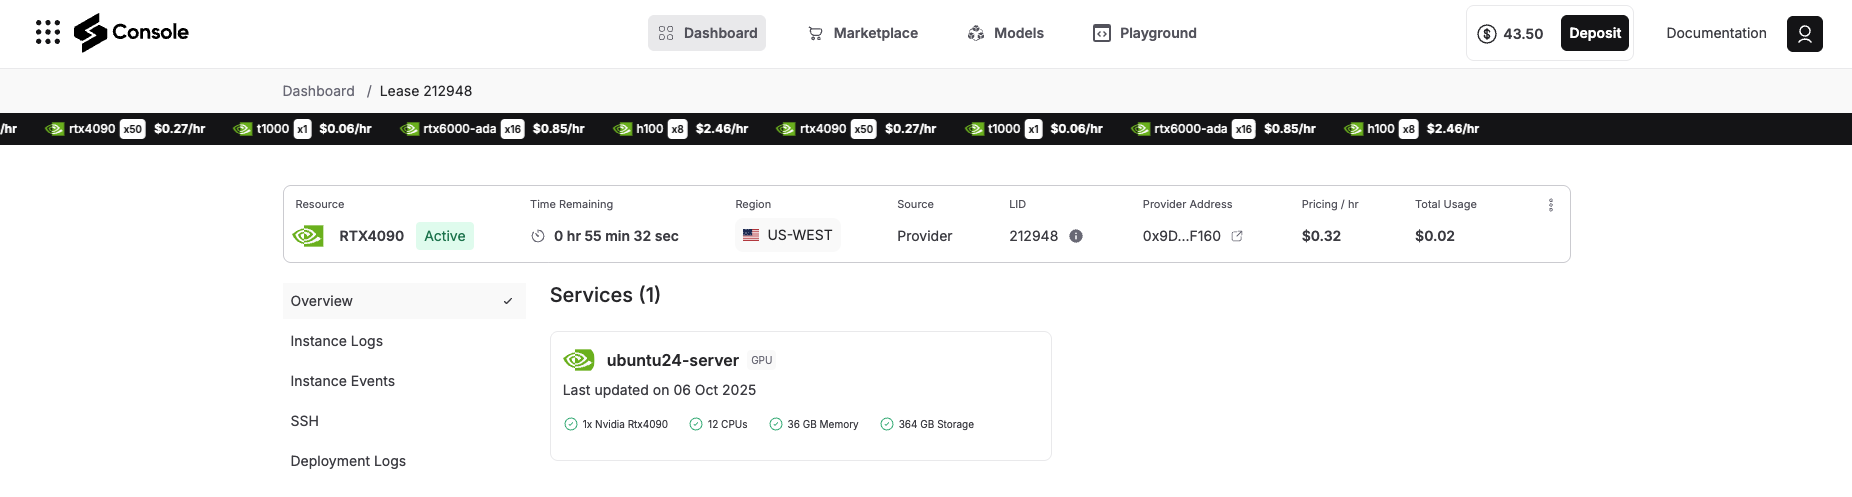
Step 6: Access Your Deployment
Once deployment completes, navigate to the Overview tab in your Spheron console. You’ll see your deployment listed with:
-
Status: Running
-
Provider details: GPU location and specifications
-
Connection information: SSH access details
-
Port mappings: Any exposed services
Step 7: Connect via SSH
Click the SSH tab, and you will see the steps on how to connect your terminal via SSH to your deployment details. It will look something like the image below, follow it:
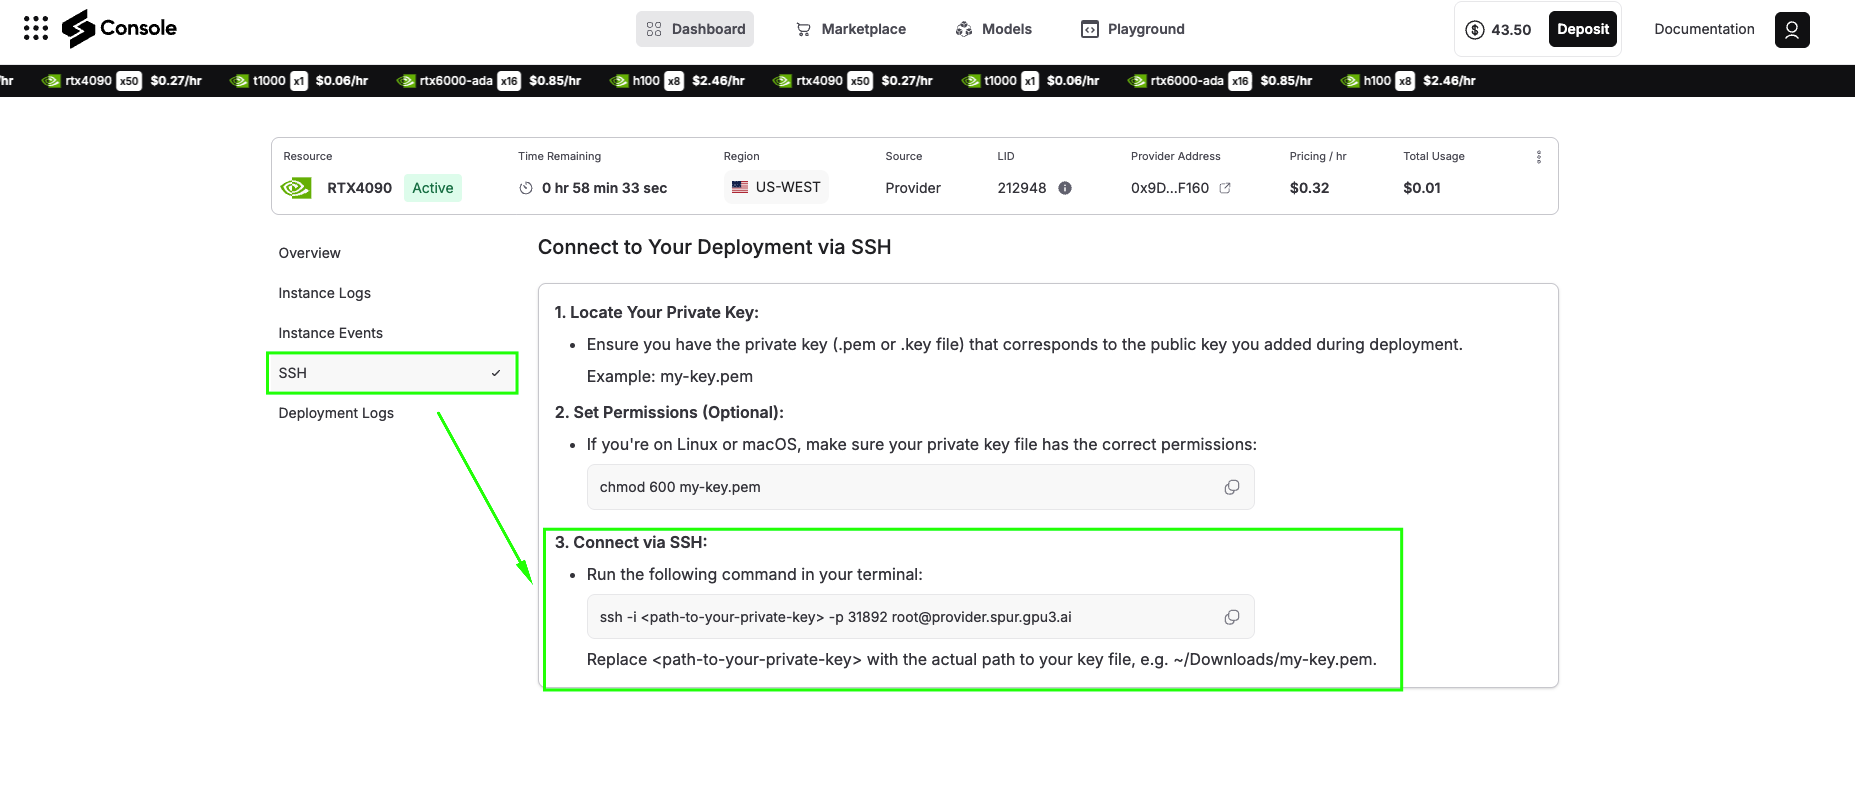
ssh -i -p root@
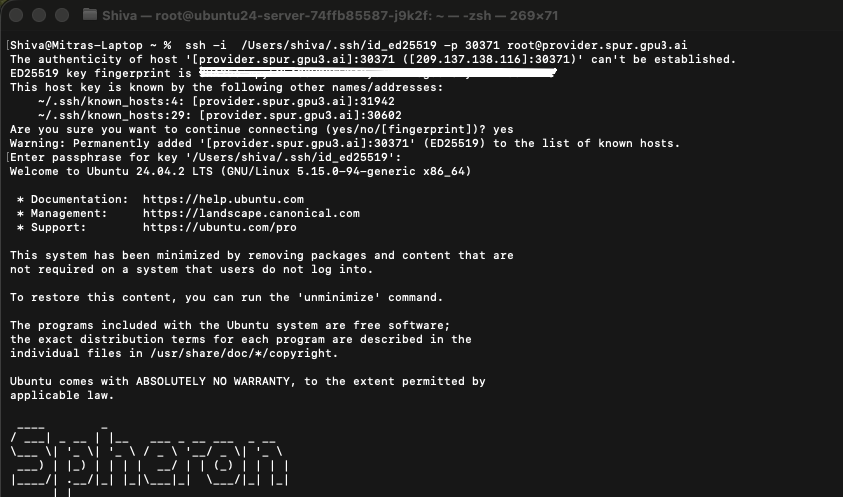
Open your terminal and paste this command. Upon your first connection, you’ll see a security prompt requesting that you verify the server’s fingerprint. Type “yes” to continue. You’re now connected to your GPU-powered virtual machine on the Spheron decentralized network.
Step 8: Upgrade to Python 3.11 and Install Pip
Your VM currently comes with Python 3.10.12 preinstalled. To upgrade to Python 3.11, we’ll use the Deadsnakes PPA, a popular repository that provides newer Python versions for Ubuntu.
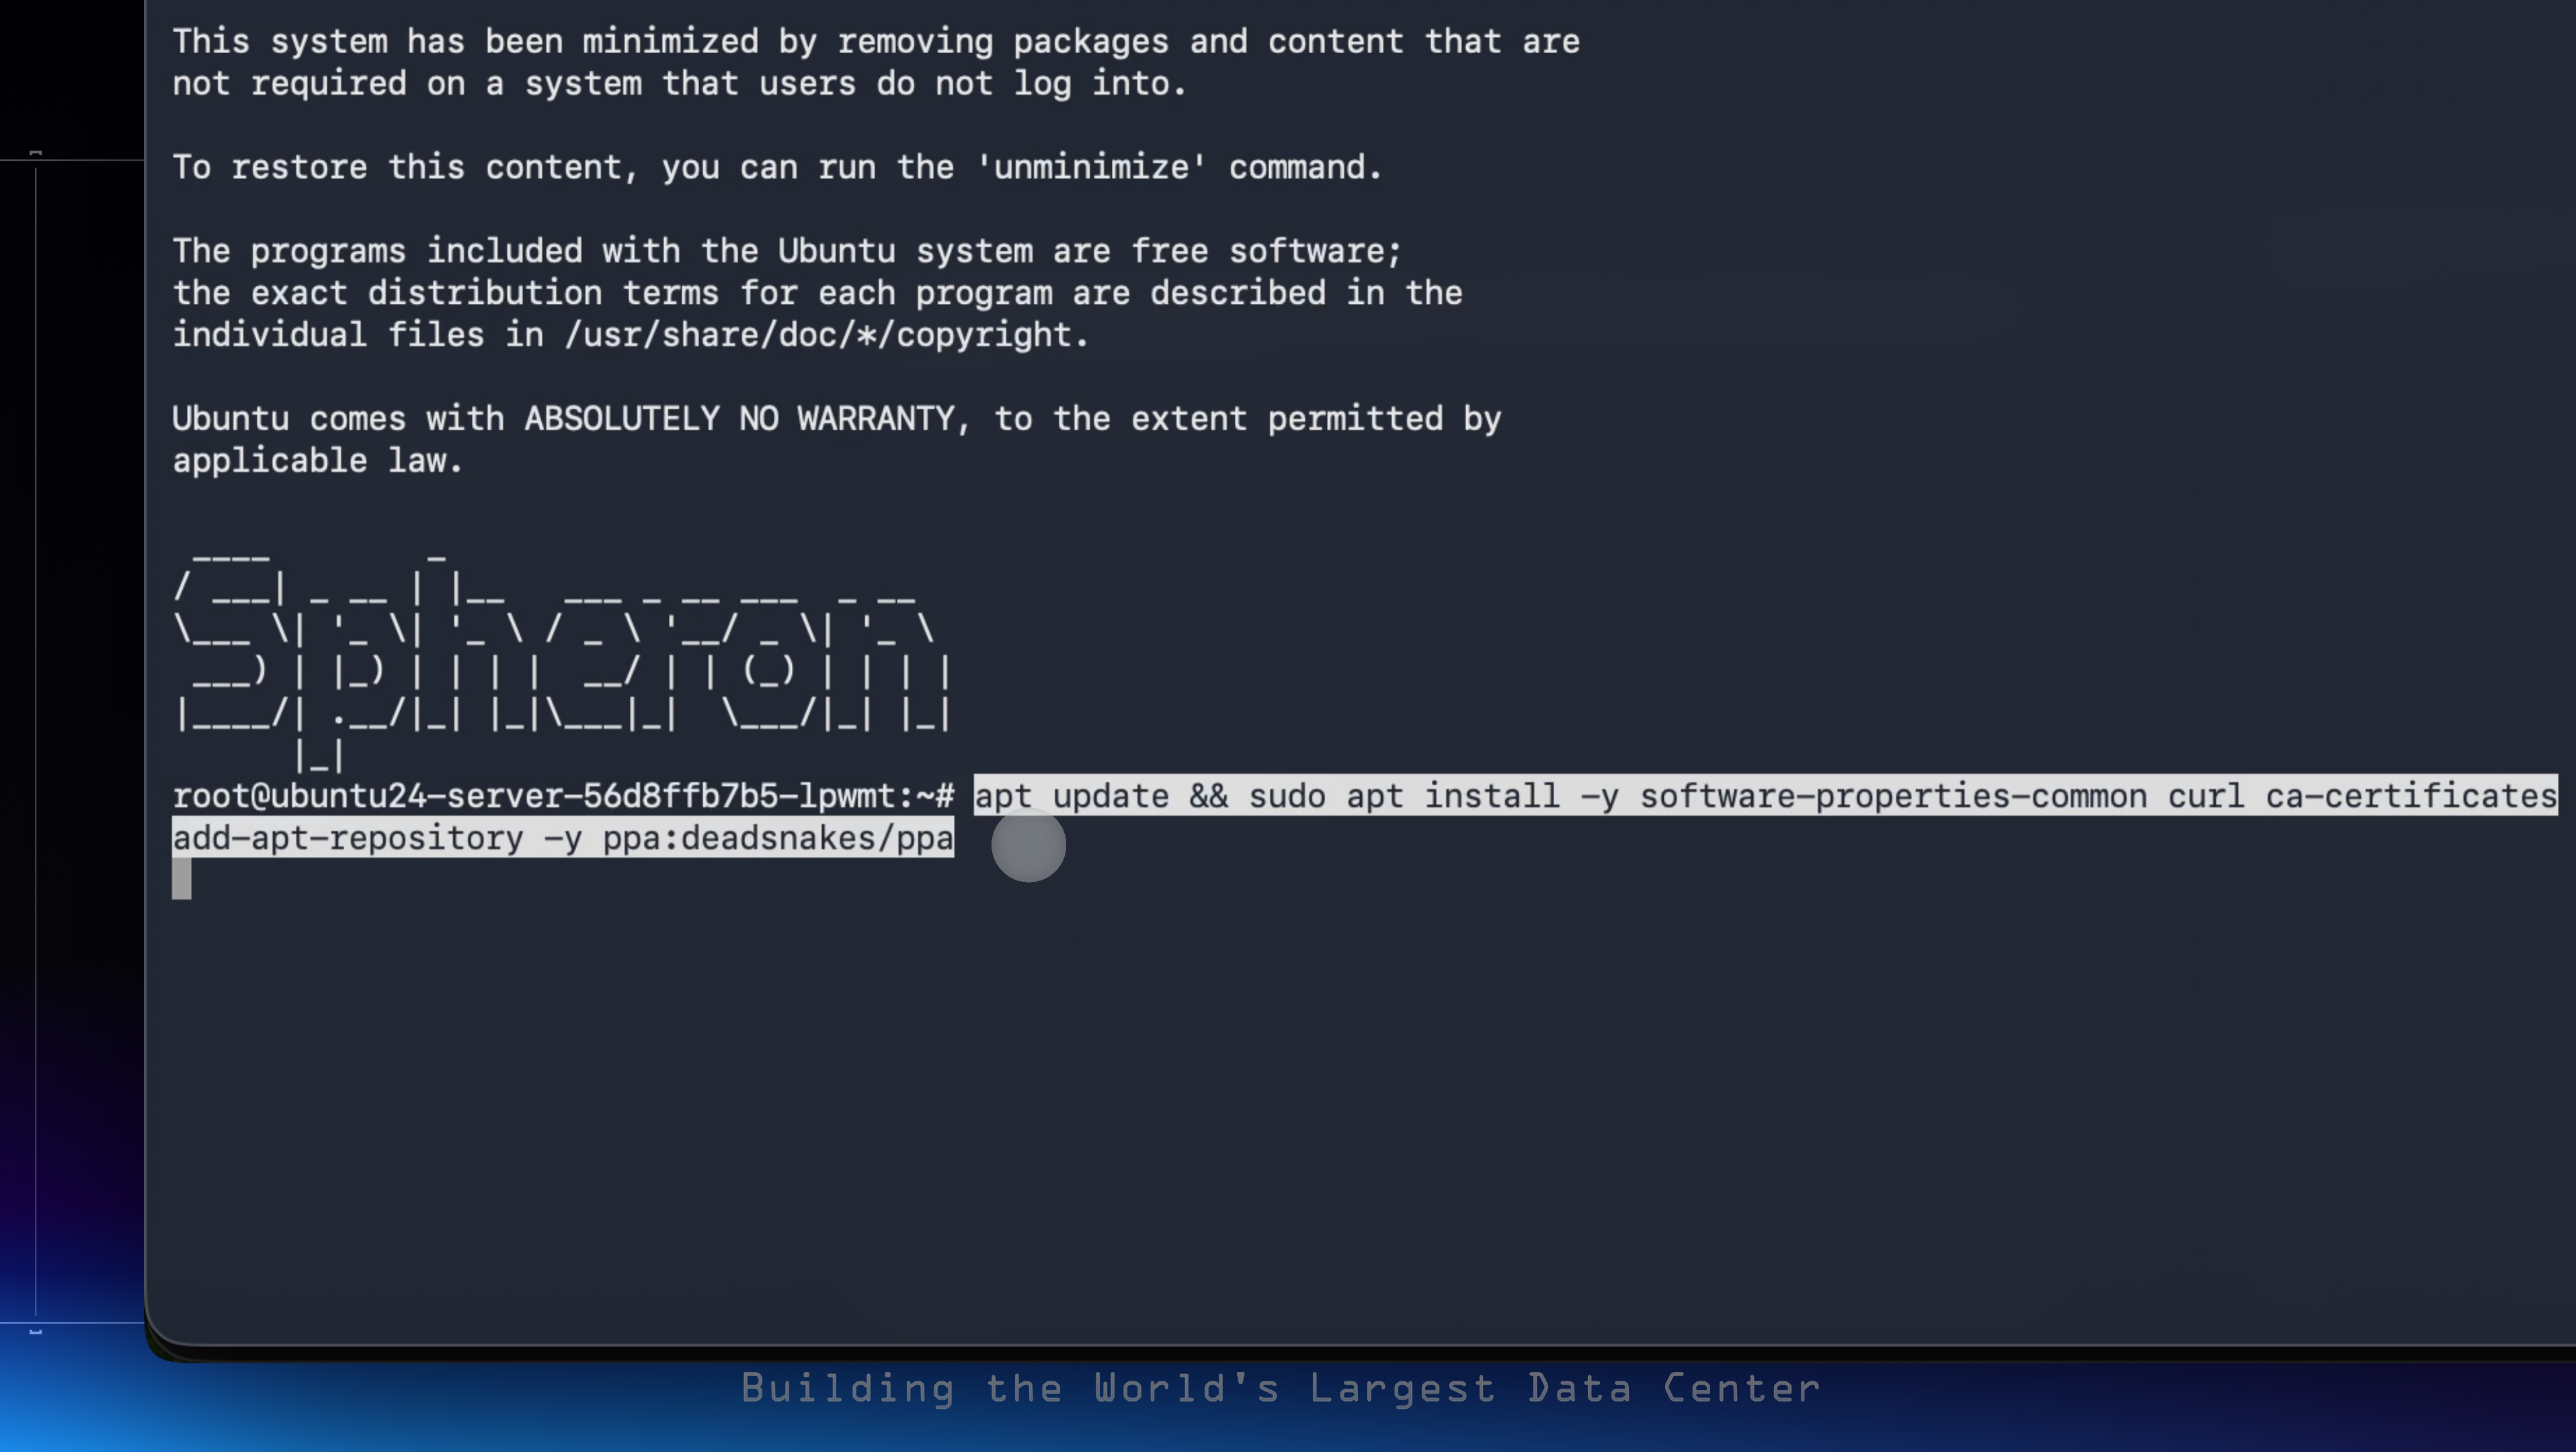
1. Add the Deadsnakes PPA
Run the following commands to update your system packages and add the Deadsnakes repository:
apt update && sudo apt install -y software-properties-common curl ca-certificates
add-apt-repository -y ppa:deadsnakes/ppa
apt update
-
software-properties-commonhelps manage additional repositories. -
curlandca-certificatesensure secure data transfer. -
Adding
ppa:deadsnakes/ppagives access to newer Python builds.
2. Install Python 3.11, Pip, and Wheel
Now, install Python 3.11 and essential packaging tools:
apt update && apt install -y software-properties-common && add-apt-repository -y ppa:deadsnakes/ppa && apt update && apt install -y python3.11 python3.11-venv python3.11-dev

-
python3.11-venvallows you to create isolated virtual environments. -
python3.11-devincludes headers for building Python extensions. -
ensurepipinstalls or upgrades Pip. -
Upgrading
pip,setuptools, andwheelensures compatibility with modern packages.
3. Ensure pip for Python3.11 and upgrade packaging tools
python3.11 -m ensurepip --upgrade && python3.11 -m pip install --upgrade pip setuptools wheel

Verify your installation:
python3.11 --version
python3.11 -m pip --version
Step 9: Create and Activate a Python 3.11 Virtual Environment
To prevent package conflicts, it’s best to use a dedicated virtual environment.
python3.11 -m venv ~/.venvs/py311
source ~/.venvs/py311/bin/activate
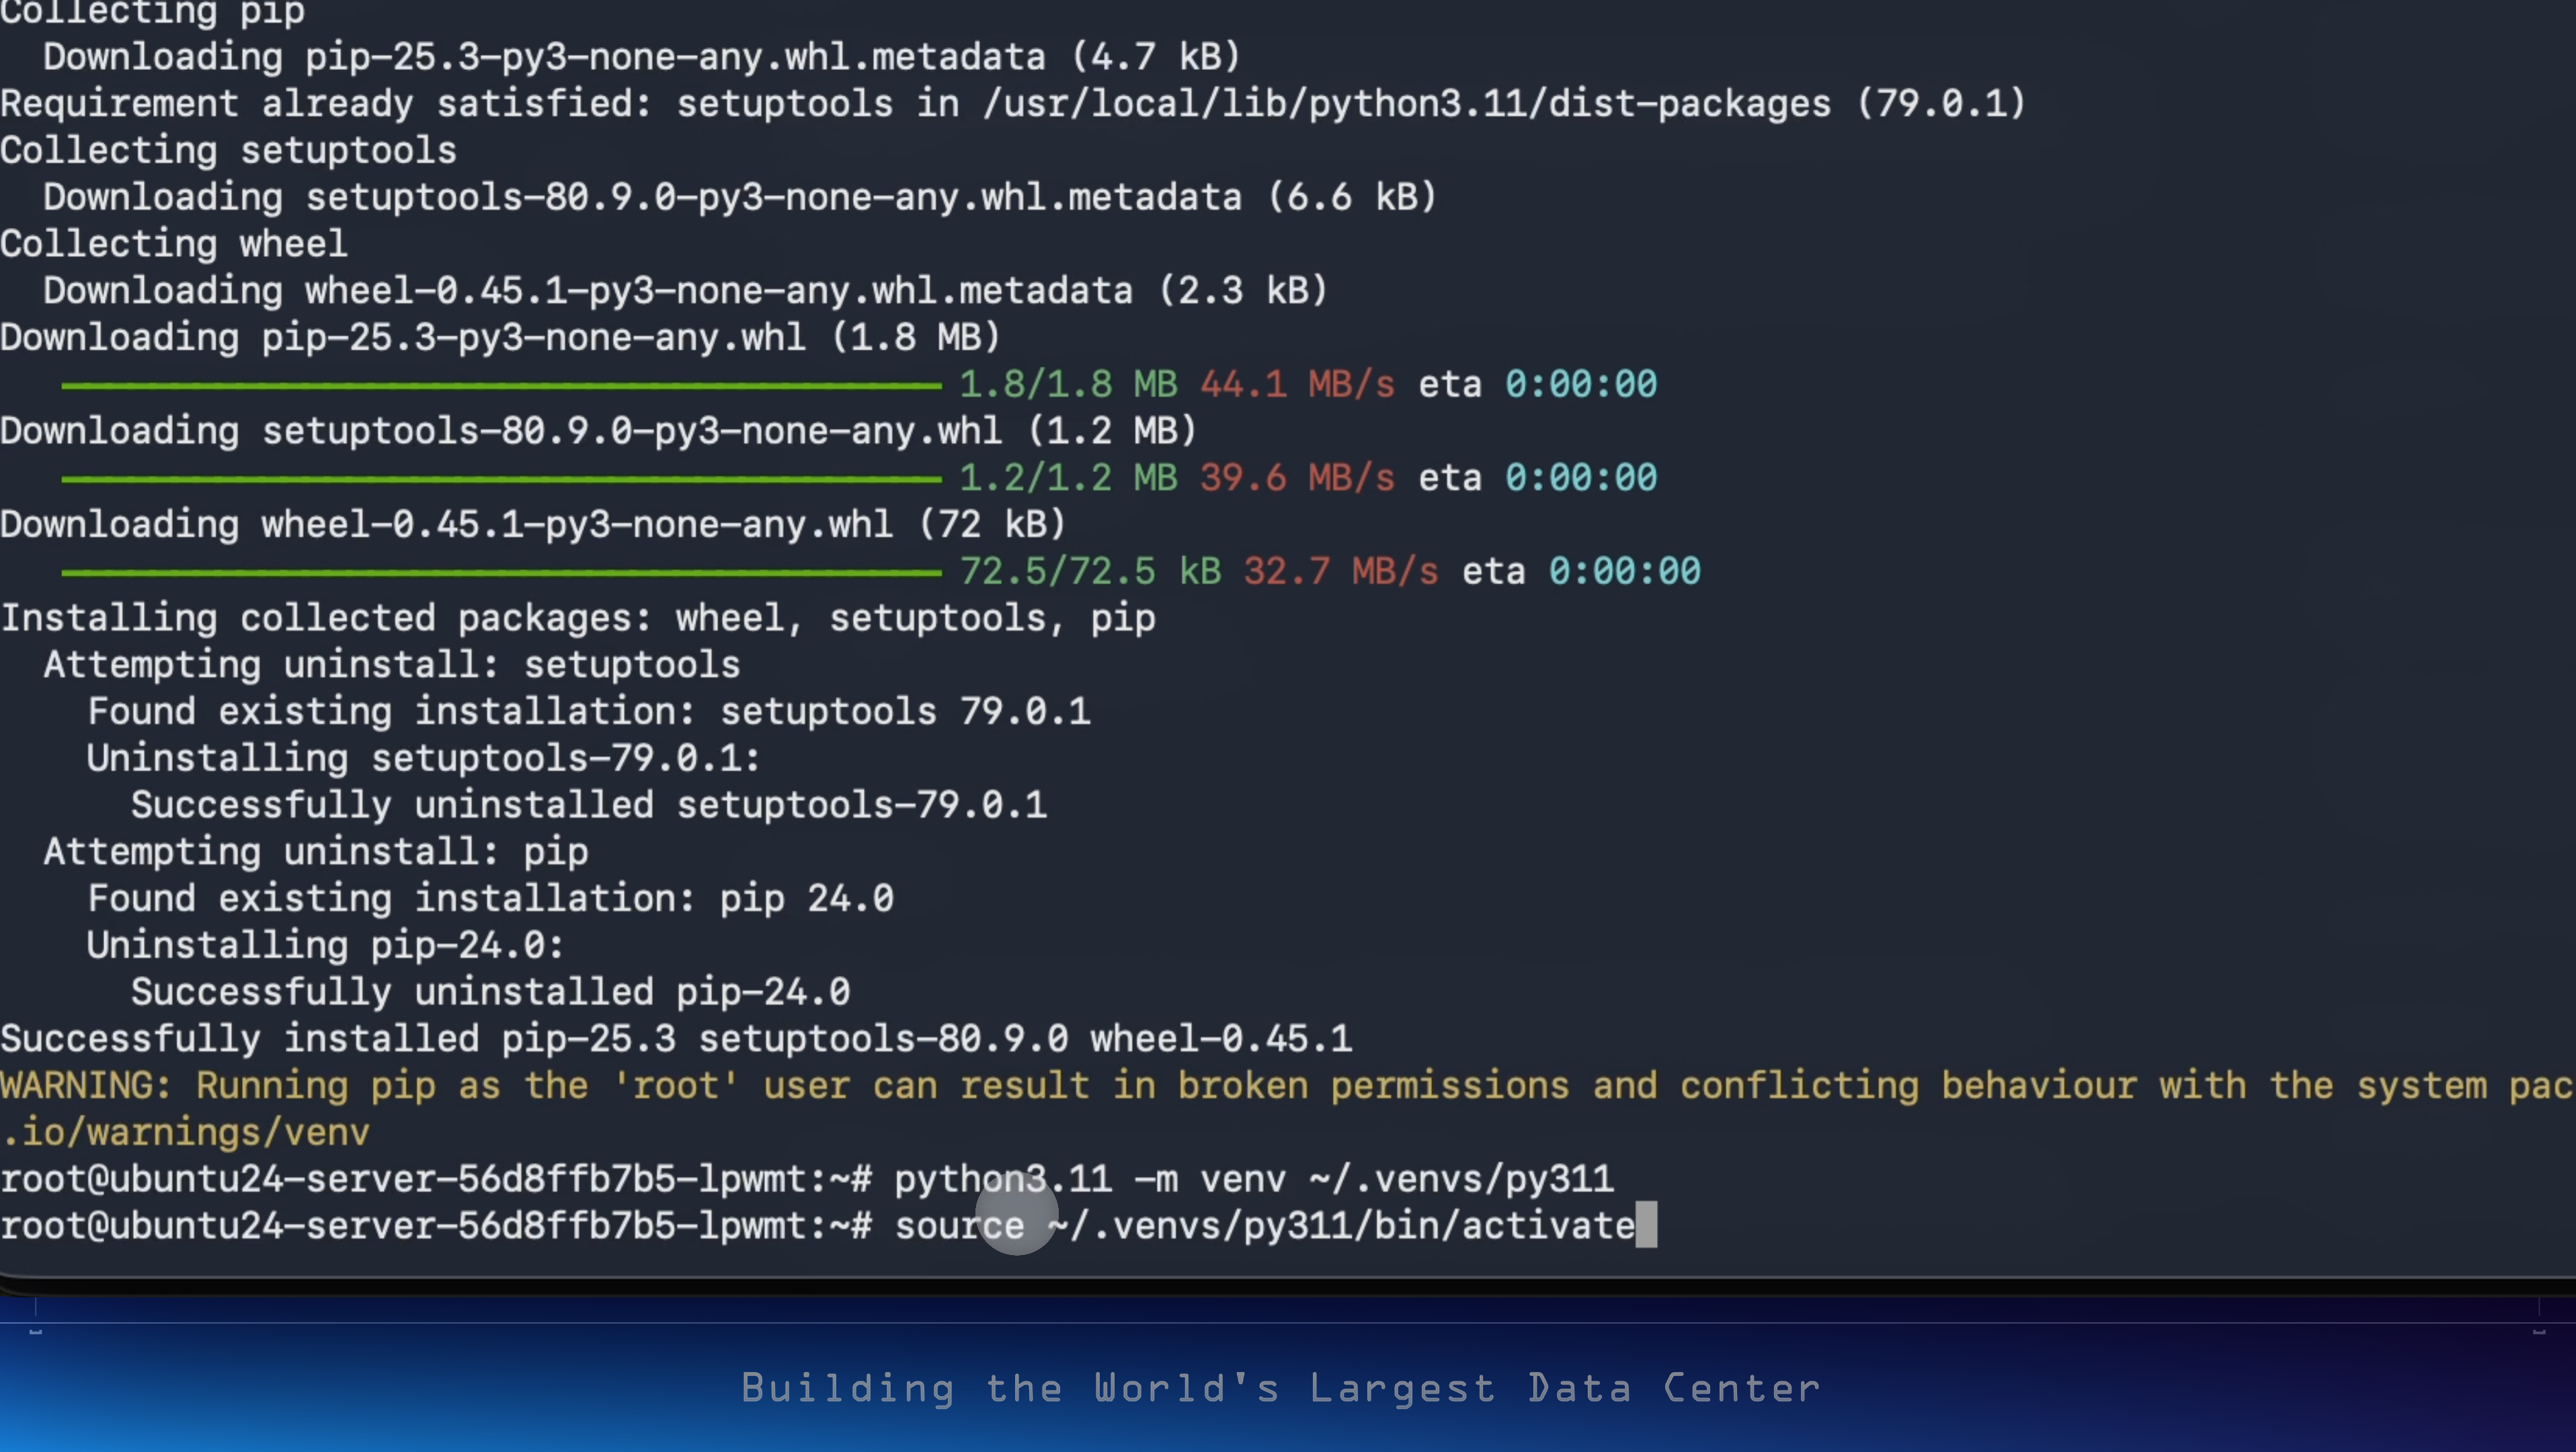
-
This creates a new environment in
~/.venvs/py311. -
The
sourceThe command activates it, isolating dependencies.
Step 10: Install System Dependencies for PDF Rendering
Next, install system packages required by OCR tools and PDF rendering libraries.
apt-get update
apt-get install -y poppler-utils ttf-mscorefonts-installer msttcorefonts \
  fonts-crosextra-caladea fonts-crosextra-carlito gsfonts lcdf-typetools
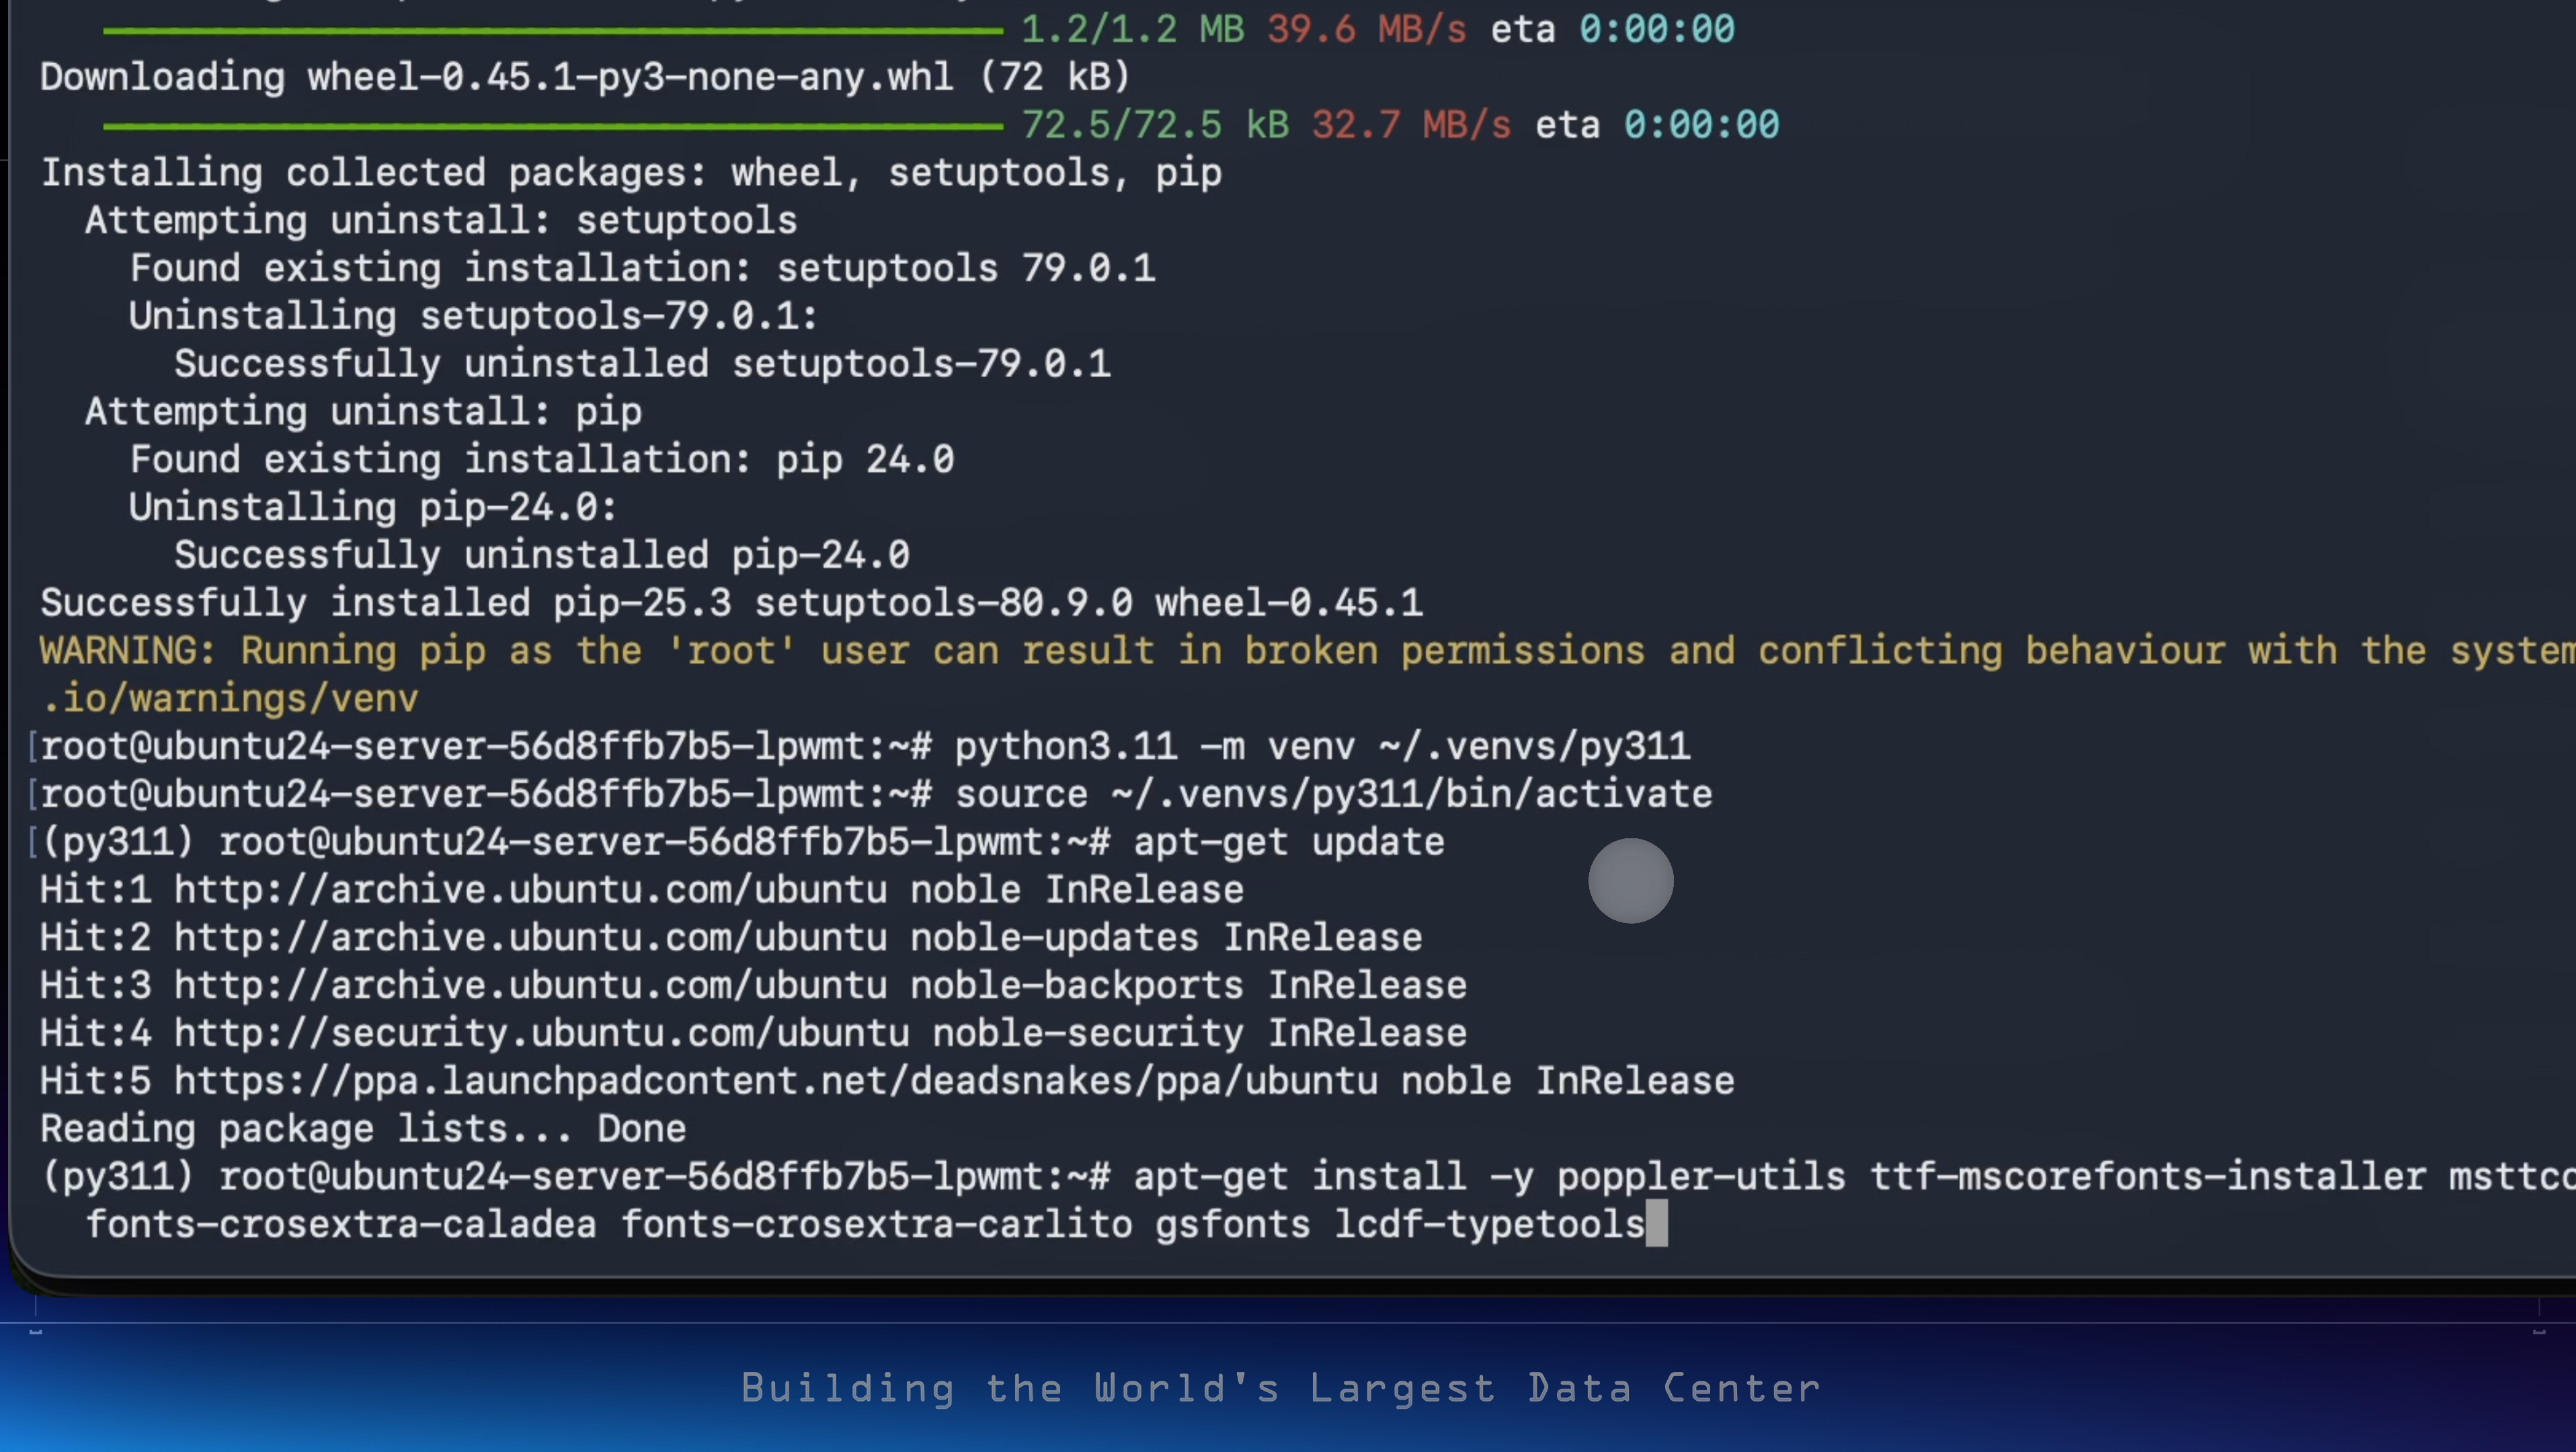
Explanation:
-
poppler-utilsprovides PDF text extraction and conversion tools. -
ttf-mscorefonts-installerand other font packages ensure accurate text rendering. -
gsfontsandlcdf-typetoolsimprove compatibility with a wide range of PDFs.
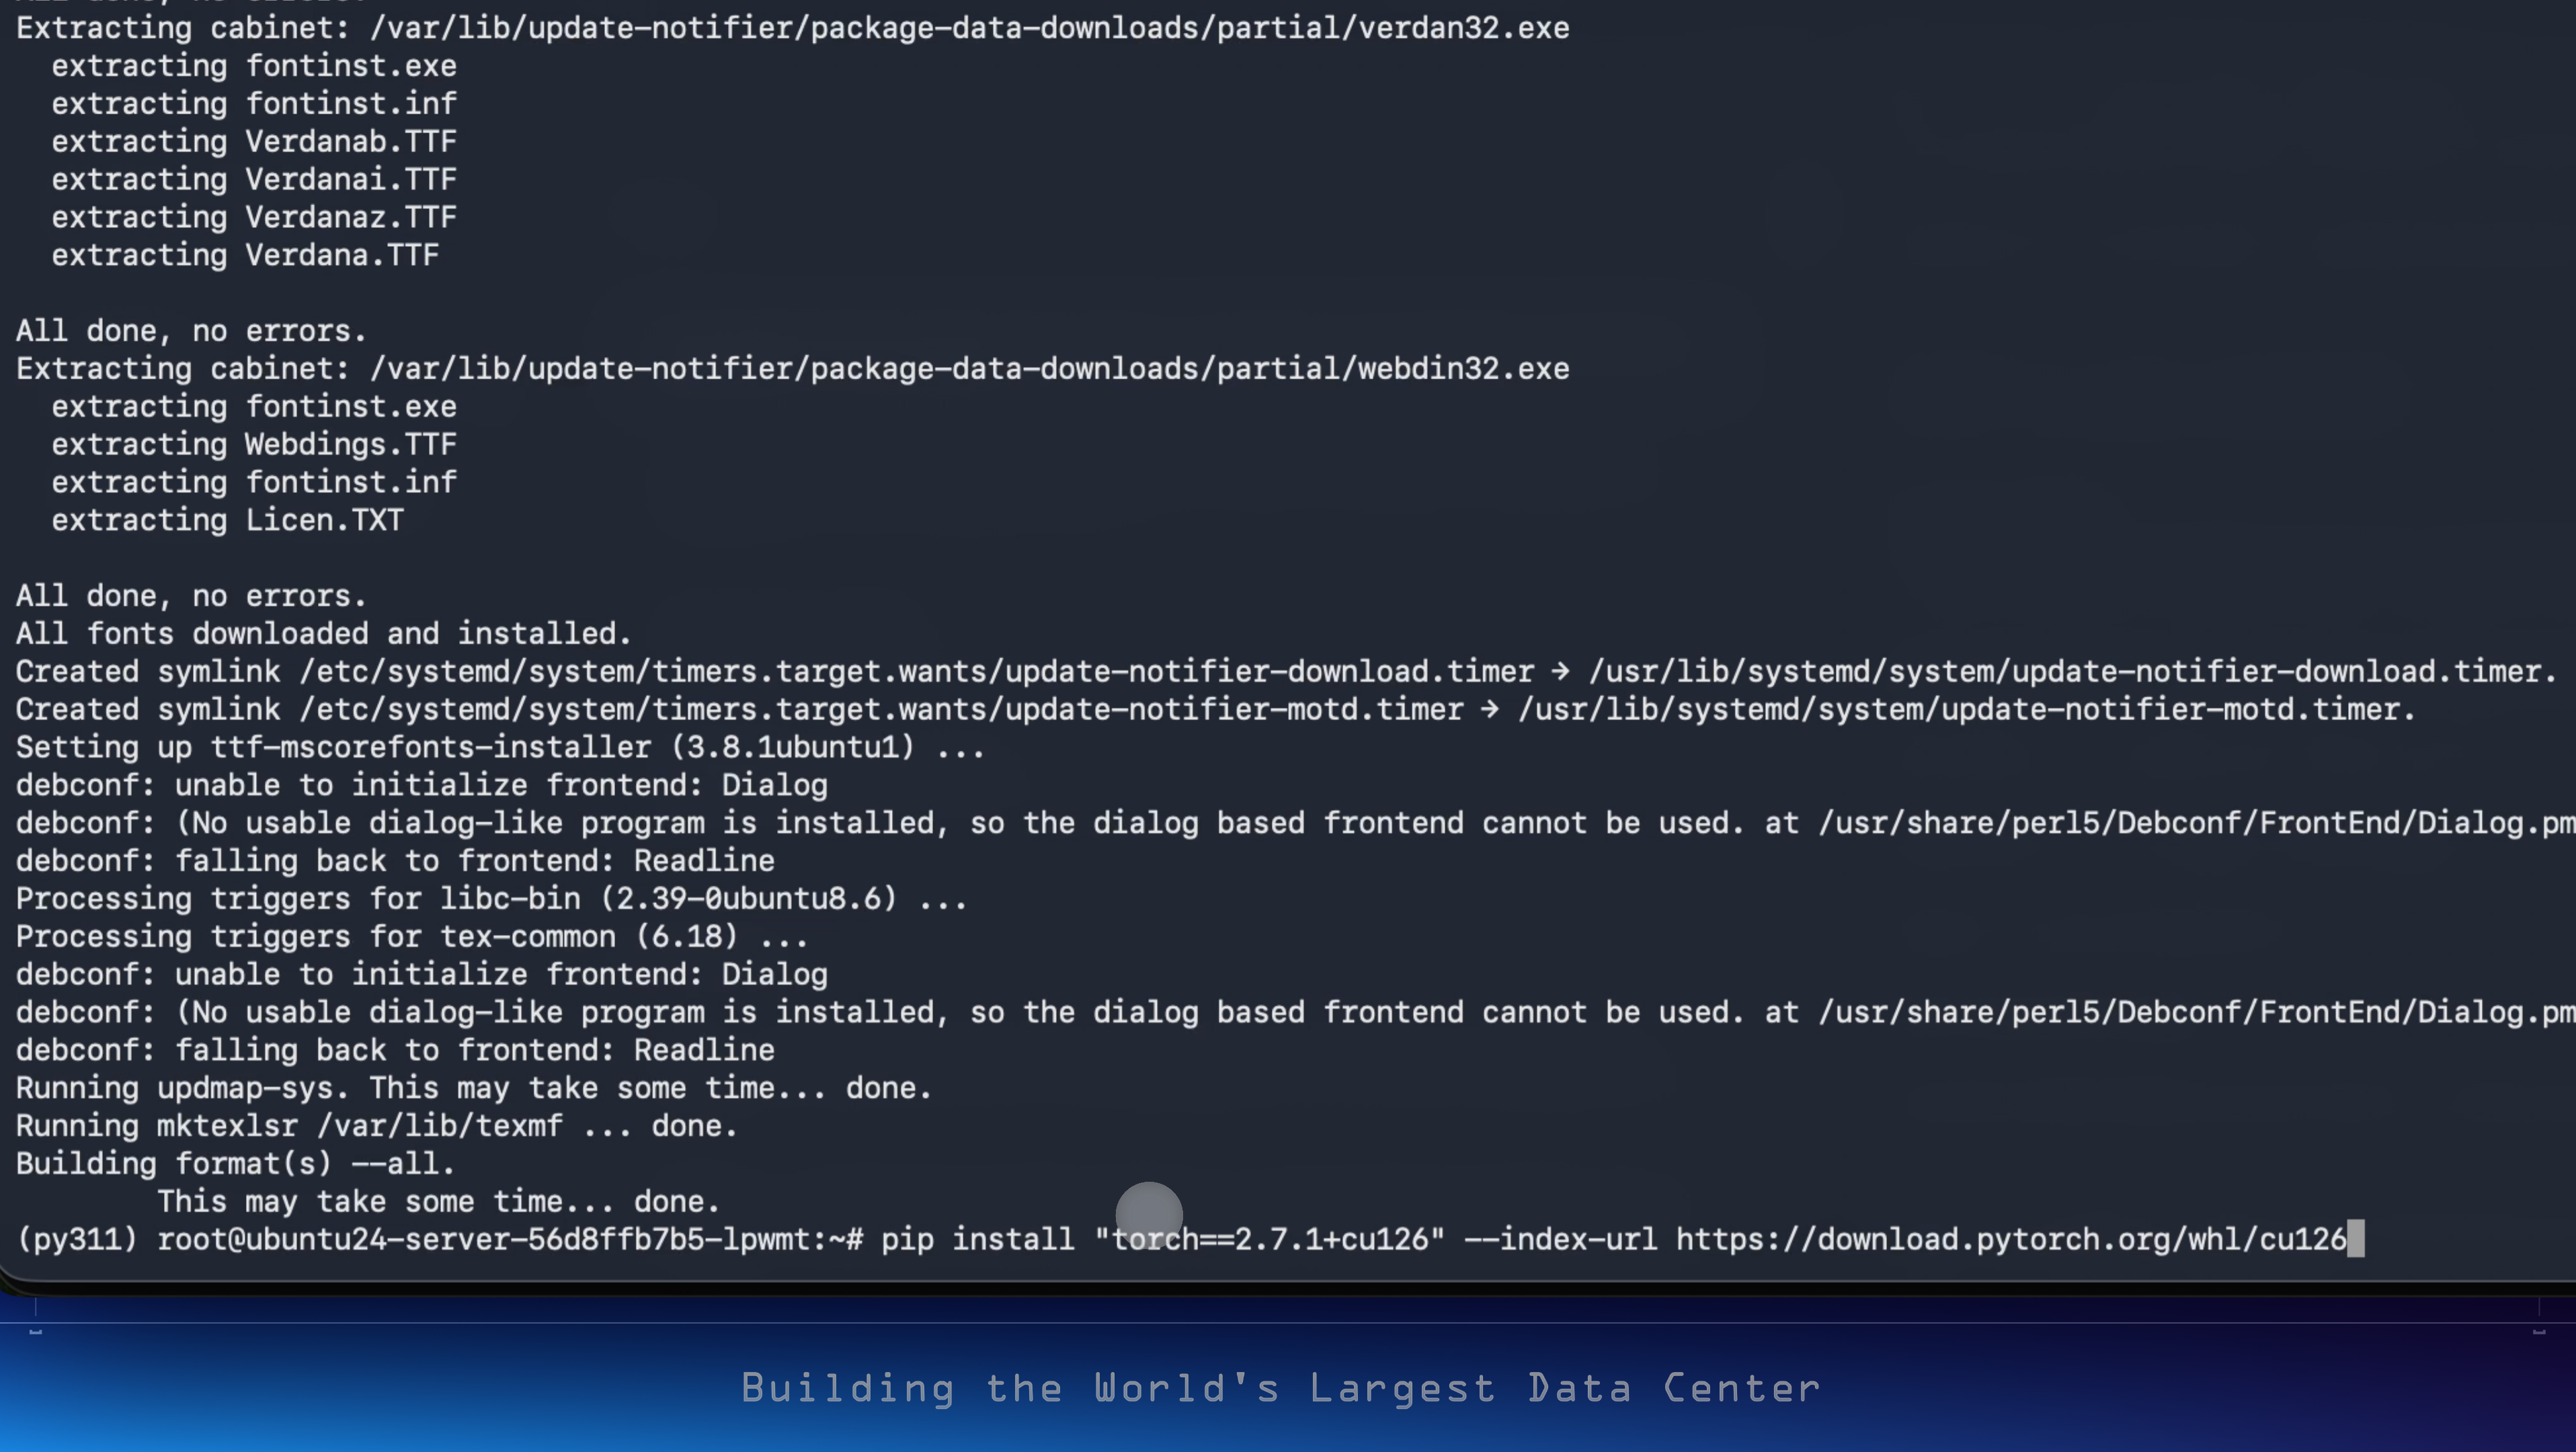
Step 11: Install PyTorch 2.7.1 (CUDA 12.6)
Now, install PyTorch 2.7.1 with CUDA 12.6 support for GPU acceleration.
pip install "torch==2.7.1+cu126" --index-url https://download.pytorch.org/whl/cu126
This pulls the correct PyTorch wheel optimized for CUDA 12.6, ensuring full GPU support.
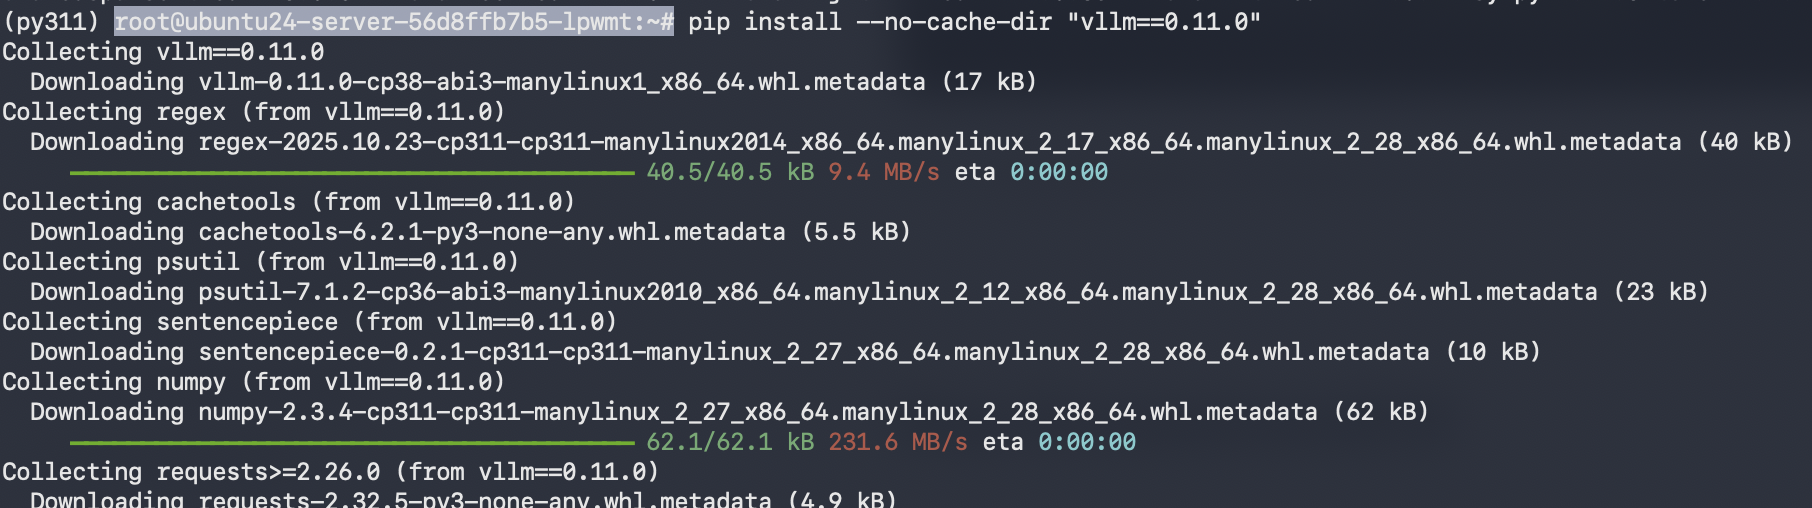
Step 12: Install vLLM 0.11.0
Install vLLM, the high-performance inference engine used by olmOCR.
pip install --no-cache-dir "vllm==0.11.0"
The --no-cache-dir The flag ensures a fresh install without using old cached packages.
Step 13: Install olmOCR
Now, install olmOCR, the FP8-quantized OCR-VLM model by AllenAI.
pip install -U --no-deps "olmocr[gpu]"

-
The
-Uflag upgrades to the latest compatible version. -
--no-depsavoids reinstalling dependencies you already have. -
The
[gpu]tag installs GPU-optimized components.
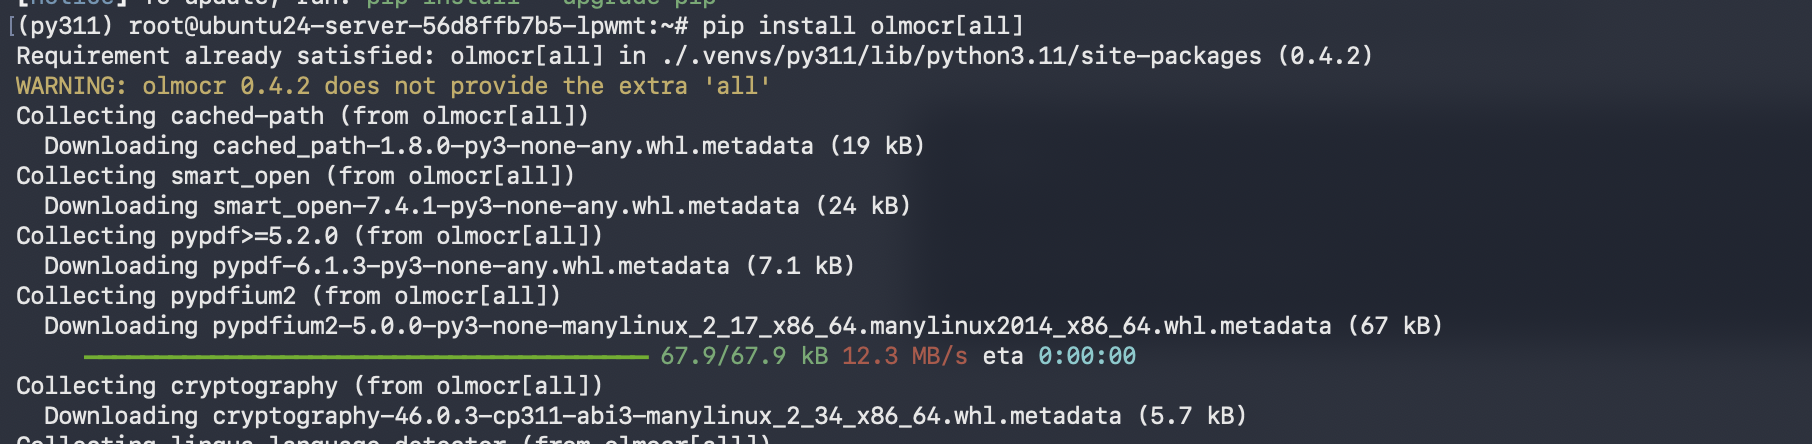
Install olmOCR full package (with all extras)
pip install olmocr[all]
What it does: installs GCC, make, and other tools needed to build any packages that require native compilation.
apt-get update && apt-get install -y build-essential

Step 15: Run the olmOCR Pipeline
Downloads a test PDF (arXiv paper) to run through the OCR pipeline. You can same commands to download other PDFs and just change the https link to download
wget -O /root/arxiv-paper.pdf "https://www.arxiv.org/pdf/2510.03847"

Finally, test your setup by running the olmOCR pipeline on a sample PDF.
python -m olmocr.pipeline ./workspace --markdown --pdfs /root/arxiv-paper.pdf

-
This command launches the olmOCR pipeline, which automatically starts an internal vLLM inference server.
-
The
--markdownflag outputs results in Markdown format. -
--pdfsspecifies the PDF file(s) to process.

You’ve now successfully installed and configured olmOCR-2-7B-1025-FP8, AllenAI’s FP8-quantized OCR-VLM, on your GPU-enabled VM. This setup combines the power of Python 3.11, PyTorch 2.7.1, and vLLM 0.11.0 to deliver production-grade OCR performance with remarkable efficiency.
You can find the output in the./workspace
The FP8 quantization ensures a lightweight memory footprint while maintaining top-tier accuracy, achieving an impressive ≈82.4 ± 1.1 olmOCR-Bench score. With vLLM’s parallel inference capabilities, you can process documents at scale, converting scanned PDFs, tables, and handwritten notes into structured, Markdown-formatted text within seconds. This configuration is ideal for batch processing, data extraction pipelines, or even as the foundation for a scalable, AI-powered document-processing service. In essence, you now have a high-performance, GPU-optimized OCR stack ready for both research and production workloads.